Dear friends welcome to another video!
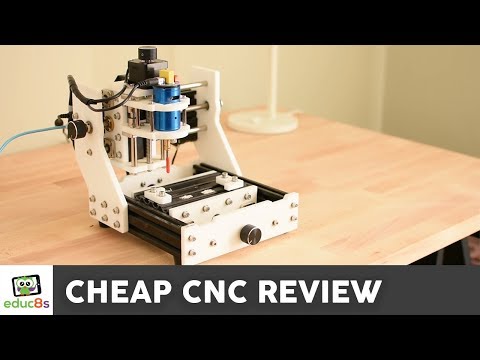
I am really excited because today we are going to take a first look at this CNC machine!
It is a low-cost CNC machine which can achieve some amazing results!
Without any further delay let's get started!
Hello, guys, I am Nick and welcome to educ8s.tv a channel that is all about DIY electronics
projects.
In this channel, I share everything about the projects I build to help you develop similar
projects or inspire you to start making things because it is easy, fun and creative.
Subscribe to the channel now if you do not want to miss any future video.
In this video, I am going to share with you my experience with this new CNC machine.
I own this machine for about two months now and now and I am ready to share my opinion
about it with you.
I am an absolute beginner in CNC milling and machining.
Before receiving this machine, I had never used a machine like this so in this video
I will describe my experience as a first time user of a cheap CNC machine.
I discovered this small and low-cost CNC machine while browsing on Banggood's website.
I always wanted to add a CNC machine to my workshop and before spending a large amount
of money for a big machine I thought it would be a good idea to try a cheap one first, learn
the basics and then, moving on to a more advanced one.
That's why I decided to try it.
The machine costs around 300$ at the time I am recording this video.
Banggood was kind enough was kind enough to send me this CNC machine to try it and share
my opinion about it with you!It is one of the cheapest machines out there, and from
the images on the product page, it seems it can produce amazing results!
I almost repeated those results with the provides woods pieces and files, but unfortunately,
I accidentally destroyed the end mills because I was a complete beginner with CNC machines.
The machine comes as a kit in a big box which weights over 10Kgs!
All the parts inside were packaged very well, and it arrived intact.
There was only one important thing missing, an assembly manual!
Unfortunately, the kit comes with no printed instruction or any manual.
So, after searching online I discovered some images from Eleksmaker the creators of the
machine that describe the assembly of the machine.
It took me around 10 hours to build the machine, mostly due to the lack of a proper assembly
manual.
I also watched this video which provided a lot of information.
You are in better luck though, the creators of the machine created a new webpage with
detailed instructions about the assembly procedure a few weeks ago.
After that, I was ready to test the machine!
But where is the CD?
There was no CD inside the package.
Once again I searched the internet for software.
It took me a couple of days to understand how this machine works and what kind of software
I need.
I will try to explain the workflow from start to finish.
Let say we want to create a simple wooden Christmas ornament like this one.
First of all, we have to design it in a design software.
We are going to use Easel a free online tool today.
This tool will generate a g-code file.
Next, we are going to use another software to send this file to the machine.
We are going to use Universal-Gcode Sender today.
The machine is running its own piece of software to communicate with the computer to receive
the g-code file, control the stepper motors and the spindle.
The software the CNC machine is running is a simple Arduino sketch because the brains
of the machine are our familiar Arduino Nano!
Now that we know the workflow let's create our first wooden part.
First of all, we need to load the latest firmware to the CNC machine.
All we have to do is to upload the firmware the manufacturer of the machine offers.
In order to upload the firmware to the machine, you need to connect it to your computer.
After that, we power on the machine and install the CH340 USB to serial driver if it is not
already installed on your machine.
We open the Xloader program, and we load the Eleks-v0.9.hex file.
The machine is now configured.
You find a link to all the files in the description below.
Now let's design our part.
I tried a lot of design software, but I think the easiest way to start is to use Easel,
an online tool by Inventables, the creators of the famous X-Carve CNC machine.
This tool is free, you just have to sign up, and you are ready to use the software.
We create a new project, and we set up our machine.
The work area is around 150mm x 60mm.
We set the spindle control to automatic and the RPM to 5.000.
Now we need to import the dimensions of the piece of wood we are going to mill.
Be very precise with your measurements by using a digital caliper.
Now we can design the part.
I chose a tree icon from the examples, and I resize it to fit to the size of the wood
piece I have.
I choose the cut tab; the cut depth is going to be 5.3mm since 5.3mm is the thickness of
the wood piece.
I won't use any tabs this time so I disable this feature.
The next step is to select the end mill we are going to use.
I am going to use a 2mm end mill from this kit I bought from banggood.
You can find a link to it below.
This CNC machine comes with 2 end mills that are suitable for engraving but not for cutting
wood.
Next, we press the "Cut Settings" and we go to Custom.
I change the "Depth per pass" field to 0.2mm.
We are almost ready.
We go to Machine -> Advanced and we set the "Safety Height" at 0.3mm.
We press the Generate g-code button, and then the export-gcode button.
That's it!
Our g-code file is ready.
Now all we have to is to send this file to the CNC machine using the Universal G-Code
sender software.
We have to follow the instructions I found online in order to configure the software
for this CNC machine.
After trying a test project with the machine, I noticed that the Z-axis movement was reversed!
After searching online, I discovered the solution.
We have to reverse the Z-axis movement by software by going to Firmware Settings and
setting the parameter #3=4.
Now we open the gcode file we created before, and we press Visualize.
We can see our design and the path the end mill is going to follow.
We are only one step away.
I place the wood piece on the CNC table, and I attach it using double-sided tape.
Beneath it, I have attached another thin piece of wood to protect the end mill in case it
cuts through our 5mm wood piece due to some error.
Then we manually move the spindle and place the end mill at the bottom left corner of
our piece of wood.
The end mill must be very close to the wood, almost touching it.
Now, we have to press the reset zero button at the Universal G-Code sender software.
This is very important; we have to press the button each time we start a new project.
Finally, we are ready to press the Send button.
The machine starts working and the spindle is moving.
We can watch the path that spindle is going to follow in the Visualize window as well.
The G-code file is sent to the machine line after line, so the CNC machine must be connected
to the computer at all times.
I really like watching the CNC machine doing its thing.
It is really very cool to watch a machine cutting wood by itself.
While the CNC does its job, let me tell you about a new Android game I developed.
It is called Fact or Fiction, and it is a free Quiz Game.
It contains thousands of facts, and it supports two languages, for now, English and Greek.
If you like quiz games, I am sure you are going to enjoy this one as well.
You can download it for free from the Google Play Store.
I will provide a link to it in the description of the video below.
A few minutes later the part is ready!
We remove it from the CNC table like this, and our part is almost ready!
It looks so cool!
All it needs is a bit of sanding!
As you can see, creating complex wooden parts is not possible with no woodworking skills
at all!
We can also use this machine to create parts and objects out of Plexiglas as well or mill
our own PCBs.
I haven't tried any of this yet; I just created some wooden parts so far.
As a final thought, I really like this machine, and I think I am going to use it a lot in
the near future.
My goal is to buy a more advanced CNC machine in the future, but until then, I will experiment
with this small one, to gain experience and do some cool projects with it.
The machine is great to learn the basics of a CNC machine, but the learning curve is steep.
The assembly of the machine was frustrating because of the lack of a proper assembly manual.
Luckily, there is a better one available now so you will have a better experience than
I did.
The next disadvantage is the lack of proper software.
I had to find out by myself what software to use with the machine and how to operate
it.
I wish there was a video like this one published on Youtube when I learned the basics.
It would have saved me many days of trial and error.
One last disadvantage is the screws provided with the machine.
Especially the screws on the spindle must be very strong and sturdy to withstand the
forces and the vibrations.
Replace the provided screws with better M3 screws.
I destroyed 5 end mills and many wood pieces when using the provided screws.
You are going to find everything you need, from screws and endmills to software and instructions
in the description below.
If you overcome these problems, the results are really rewarding.
You can achieve amazing results with this machine if you learn how to use it.
I am looking forward to trying new things with the machine now that I know how to operate
it.
I will try to mill PCBs, to cut Plexiglass parts, and engrave wooden parts.
I managed to engrave this before my end mill broke.
The detail is stunning!
I can't wait to try it again with my new end mills.
I think a CNC machine is a great tool for every maker.
It opens up a whole world of new projects.
I would love to hear your opinion about this CNC machine and CNC machines in general.
Do you find it useful and are you going to invest in one in the future.
Please post your comments in the comments section below!
If this is your first time here, I would love to have you subscribed.
In this channel, I post videos about DIY projects twice a month.
I love making things, and I believe that anyone can make things, anyone can become a maker.
That's why I created this channel, to share my knowledge with the community and learn
from the community.
I hope you will join us.
I will see you in the next video!
[ Translating these subtitles? Add your name here! ]


Không có nhận xét nào:
Đăng nhận xét