There is a box in every crafter's home, that is filled with old unfinished projects,
and stuff you thrifted in the hopes of upcycling.
That becomes abandoned, that becomes forgotten.
Well this is the series that tackles that forgotten box.
This is the Style Pile!
This video is supported in part by Storyblocks.
Hello!
Welcome back to the Style Pile, and we're up to episode 18… and somehow my style pile
has only grown bigger… which means I definitely need to start making these videos more frequently
and STOP buying new stuff to add to the pile.
ANYWAY, I'd like to introduce you all to a NEW component of my "style pile" (let's
be real, style pile is just a euphemistic term for "hoarding problem" at this point).
Yes, it's a third box.
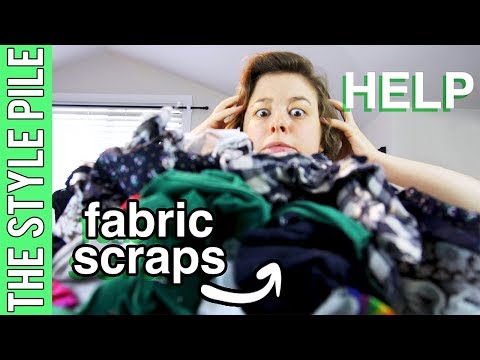
So this third box is entirely scraps, old worn-out clothes and unwanted projects.
So for the last 6 months or so I've been saving every single bit of fabric scrap from
other projects, either from when I'm upcycling things – like, this is the bottom of the
t-shirt that I cut off in episode 16 – or when I'm making clothes from scratch, and
there's curvy bits in the pattern… like this fabric here is some scraps leftover from
making a pair of pants!
I also throw things in here when I make something ridiculous for make thrift buy that I'm
never going to wear… does anybody recognize this particular one?
Now a huge reason that I've been doing this is that I recently watched this program, that
aired in Australia, called "The War On Waste" and this is how many clothes Australians throw
out every ten minutes!
So after seeing this, I was like, WELP, I'm never throwing out any tiny piece of fabric
or tiny piece of thread ever again, because I don't want to contribute to this huge
waste of fabric and resources.
And so I have ended up with this quickly growing scrap pile.
So let's see what we can do with these!
Can we turn them into something new?
Project number 1!
The first thing that I'm going to try and make with my scrap fabrics is a Plushie Toy!
Now it's my niece's 5th birthday this week, and I wanted to make her something cute!
So, I'm going to use THIS piece of fabric, which is also a cut off from this cotton t-shirt
that I also upcycled in the episode 16, and I'm going to iron an image onto it.
So first, I needed to find an image.
Now, I wanted to make a cute cartoon animal plushie.
But I also didn't want to infringe on any copyrights.
So I headed over to my favourite royalty free graphics website – formerly known as Graphic
Stock – you guys know that I'm a huge fan, and I've used them before, I've told
you about them before – Storyblocks!
And full disclosure, they are also sponsoring this video!
Anyway first I did a search for some owls, coz I think owls are really cute, they'd make
a cute plushie – but [laughing] why are you so sad?!
And then I looked up unicorns and I actually found some super cute narwhals, which would
also make a pretty great plushie.
Then I typed in hedgehog, and I ended up finding this super cute image, but I also ended up
deciding to use this fox from the image instead!
So next I opened up the image in photoshop, removed the background colours, and I did
this little trick to add SEAM ALLOWANCE around the fox image, which is important for making
the plushie.
To add the seam allowance, in photoshop, with the fox layer selected, I went to Layer > Layer
Style, and I clicked on Stroke.
This opened up this box, which puts an outline around the fox image.
So I played around with outline colours and widths, and I also cleaned up the edges using
the eraser tool.
This toggle here changes the width of the outline, I bumped mine up to 20 to get an
approximately half an inch seam allowance around the fox once it was printed out.
Now I printed it out onto plain paper first to check that the size was right, before I
printed it out properly in full colour onto my photo transfer paper.
And… then, this happened.
"Nooooo!"
Sighhhh.
PRINTERS.
I swear it;s the one technology that's never really improved since I was a kid.
Anyway, this slightly-damaged the very expensive photo transfer paper that I was trying to
print on, but I didn't want it to go to waste so I put the paper through for a second attempt
AND - we finally got there!
Now for the transfer paper, I'm using Lesley Riley's TAP, which is honestly the best
transfer paper I've ever used, especially if you're making something like a plushie.
That's because when you iron it onto the fabric, the image actually sets itself INTO
the fabric instead of just being stuck on top of the fabric in a plasticy-way like other
transfers I've used.
I'll show you a close up at the end of this tutorial, and you'll see what I mean!
So I cut the fox out with scissors, and then I followed the instructions in the transfer
paper kit to set the image into the fabric.
Now this is only my second time using this transfer paper, so I'm still working out
the kinks – and larger images are harder to do than smaller ones – BUT I think that
overall, it transferred pretty well!
So once I'd transferred the image to this white cotton t-shirt scrap, I then searched
through my scrap fabric box for two more pieces that could act as 1.
the back piece, and 2.
A backing for the fox image.
The scraps just needed to be larger than the fox image.
So I ended up with these two pieces, which are both light-weight, woven, non-stretchy
cottons, and I cut them to roughly the same size as the fox image fabric.
This darker floral fabric is going to become the backing for the fox image.
I put some pins through the two layers to hold them together, and next I'm going to
sew them together like THIS.
I sewed right on the edge of that orange outline "seam allowance" that I added, using a
straight stitch.
Now because t-shirt fabric is stretchy, I was also careful to not stretch this at all
while sewing it to this backing piece.
Once that was done I carefully cut around the image, just outside of the stitches.
Then I grabbed this brown floral cotton piece, which I'm going to use as the back of the
plushie, and I flipped it so it was right-side-up, then flipped the fox down onto it – so the
two pieces of fabric are right-sides-together – and I sewed the two pieces together by
sewing around the fox just inside the white stitches there.
I'm also not sewing entirely around the fox shape – I'm going to leave a small
opening here.
Then I cut off all that excess backing fabric by cutting around the fox shape, just outside
of those two lines of stitching.
And those offcuts went right back into the scrap pile!
Then, through the small opening, I turned the fox the right way around.
I also used a pair of scissors to help me push out the more difficult corners!
And now we have a very deflated-looking fox plushie, ready to be stuffed!
Now because I'm using all scrap fabrics for this project, instead of using something
like Polyfill, I'm going to use scrap fabrics to fill it.
So this is where all my teeniest tiniest fabric scraps get their chance to shine!
A lot of these are offcuts from when I use my overlocker, or cut threads off of my sewing
machine!
However, I didn't think that even all of these scraps would be enough to fill the fox,
so I also chopped up some larger fabric scraps like this, by folding them up and then chopping
them into bits with scissors.
I also tried cutting strips with my rotary cutter just like a master chef slicing up
some vegetables.
And that worked… but it was a little bit more dangerous, so… please be careful if
you try this method!
Anyway, then I used all this shredded fabric to stuff the fox, through that little gap
in its side!
And yeah, this pile of scraps looks like more than enough to fill the fox, right?
Well, I actually needed even more than this!
So I cut up a lot more larger scraps to fill it.
Once it was filled, I hand-sewed up the small hole in the side, and it was done!
OH and before I show you the final project, I wanted to show you how well this transfer
paper goes in the fabric – see how it's really a PART of the fabric, not just stuck
on top, all plastic-y-looking, like most fabric transfers can be?
Anyway, this is what it looks like aaaaall finished!
SO, that was a really simple way of making a cute Plushie toy, BUT if you scaled it up,
this method could also be used to make something like a pillow as well!
The only "new" thing that you need in this project is transfer paper, everything
else is made from your old scraps!
[kids cartoon music plays]
SO, we still have 3 other scrap fabric projects to go, I've filmed a total of 4, but this
video is getting long enough already!
SO what I'm going to do is to break this up into a little mini-series of 4 episodes.
So come back here in 3 days, if you're watching this on the day that this comes out, to see
me try and make a sleeping mask out of all scrap fabrics and old clothes!
And then in parts 3 and 4 we'll also be trying out 2 other projects!
So as I mentioned in the beginning, StoryBlocks is sponsoring this video!
Storyblocks provides high-quality photos, vectors, icons and more that are all royalty
and copyright free, so you can use them in anything you want – seriously, they're
great if you run a business that has any graphic design component, a website, or a youtube
channel as well!
I use them a lot!
You can download anything from their 400,000-strong image library in the Member Library, AND they
also have a new Marketplace, where designers and artists license their images.
So not only does this help artists sell their work, being a Storyblocks Member gives you
60% off any of these if you want to use them for yourself.
Storyblocks is giving away a 7-day free day trial through my promo link, so that you can
try it out for yourself!
So click on the link in the description box below, or go to storyblocks.com/youtube – and
start downloading images today!
Thank you so much to Storyblocks for sponsoring this video!
And thanks to all of YOU for supporting the companies that support this channel!
Anyway, I'll see YOU all for parts 2, 3 and 4 really soon.
Bye for now!
Thank you to all of my supporters on Patreon who, along with the sponsor of this episode,
make these video possible!
To become a Patreon supporter, go to patreon.com/annikavictoria.


 For more infomation >> Helmut Kohl: So viel Geld erben seine Söhne und Enkelkinder! - Duration: 2:10.
 For more infomation >> Doogy x Sinay x Kevson - Menace II MC's - Duration: 3:13.
  For more infomation >> Baby-Sehnsucht: Noch mal Nachwuchs für Sandy Mölling? - Duration: 1:40.
 For more infomation >> Waukesha on list of best places to live - Duration: 1:23.

 For more infomation >> DeVos Medical Ethics Colloquy: Ethics of Medical Choice -- Rationing - Duration: 1:57:14.
 For more infomation >> Beyond The Veil - Duration: 9:29.
  For more infomation >> Noch vor dem 1. Kuss: Zieht Tutti schon für ihren Oli um? - Duration: 2:50.
 For more infomation >> Bucks help give basketball court facelift - Duration: 0:58.
Không có nhận xét nào:
Đăng nhận xét