Hi. This is Marty from Blue Lightning TV.
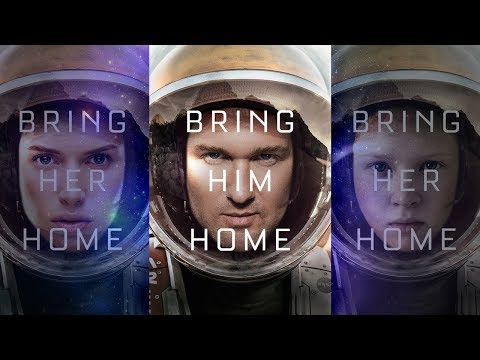
I thought it would be fun to show you how to recreate the movie poster of "The Martian"
using your own face or anyone else's.
I provided a Photoshop template that includes the poster's
astronaut spacesuit and a channel that we'll use to place a face inside the helmet.
I also provided an image of a Martian landscape that we'll use as a reflection over the face
on the glass of the helmet.
They're both located in my video's description or project files below.
In addition, I included a link for the font that was used in the poster.
Open a sharp, well-lit photo of a face looking directly at you.
I downloaded this one from Shutterstock.
If your photo needs its brightness and/or contrast adjusted, open the "Levels" window
by pressing Ctrl or Cmd + L. Since every photo is different, you'll probably adjust their
input shadows, midtones and highlights need to be adjusted differently.
For this photo, I'd like to darken its midtones, so I'll drag the Input midtone slider to the right.
We'll convert your subject into a Smart Object, so we can continue to modify if non-destructively
and, if we want to, replace it with different face without having to re-do the effects.
To do this, click the icon at the upper, right of the Layers panel and click "Convert to Smart Object".
To place it into the poster, make sure your Move Tool is active.
If it isn't, press "v" on your keyboard.
Drag it onto the tab of the poster and without releasing your mouse or pen, drag it down and release.
Pressing "Shift" kept it centered or the document.
Don't size it just yet.
Open your Channels panel.
If you don't see it, go to Window and Channels.
Ctrl-click of Cmd-click the black and white channel to make a selection of its shape.
Open back the Layers panel and click the Layer Mask icon to make a layer mask of the selection
next to the active layer.
To resize the face inside the layer mask, click the chain-link icon to unlink the layer and the layer mask.
Doing this, allows us to resize and/or re-position either of them independently of the other.
Make the face active and press Ctrl or Cmd + T to open your Transform Tool.
If the Transform's bounding box is outside your canvas, press Ctrl or Cmd + 0.
Go to a corner and when you see a diagonal, double-arrow, press and hold Alt or Option
+ Shift as you drag it in or out.
To re-position it, go inside the bounding box and drag it.
Size and position it, so you don't see the ears and the bottom of the chin should rest
at the bottom of the layer mask.
If the face is slightly at an angle, you'll want to straighten it by going outside the
bounding box near a corner and when you see a curved, double-arrow, rotate it until the
face is vertical.
Then, press Enter or Return.
To fit it back onto your canvas, press Ctrl or Cmd + 0.
Reduce the opacity of the face to 80%.
Open the Martian landscape I provided.
We'll give it a convex distortion to conform to the curved glass of the helmet.
But first, we'll convert it into a Smart Object, so we can do it non-destructively.
Go to Filter and "Lens Correction".
Click the "Custom" tab and drag the "Geometric Distortion" to the left approximately this much.
Convert it into a Smart Object once again and drag it onto the tab of the poster.
As before, without releasing your mouse or pen, press and hold "Shift" as you drag it
down and release.
Go to the layer mask and press and hold Alt or Option as you drag a copy of it next to
the Mars landscape.
Change the Blend Mode to "Overlay".
We'll reduce the size of the Martian landscape over the helmet.
Open your Transform Tool and see its entire bounding box.
Reduce the landscape over the helmet and fit it onto your canvas.
Continue to adjust its size and position.
Then, press Enter or Return.
Reduce its opacity to approximately 50%.
Next, well darken the top of the forehead, since the the helmet is casting a shadow over it.
Make the face layer active and click the New Layer icon to make a new layer.
Ctrl-click or Cmd-click the layer mask to make a selection of its shape.
We'll expand the selection to ensure that all of that that entire area of the forehead
will be darkened.
Go to Select, Modify and Expand.
Expand it by 6 pixels.
Click the Layer Mask icon to make a layer mask of the selection next to the empty layer.
Make the empty layer active and open your Gradient Tool.
Make sure the "Linear" gradient icon is active.
Open your Gradient thumbnails and if you don't see the "Black to Transparent" thumbnail,
click the gear icon and click "Reset Gradients".
Then, click the "Black to Transparent" thumbnail.
Go to the top of the forehead and press and hold Shift as you drag the Gradient Tool halfway
down and release.
Change the Blend Mode to "Overlay".
Make a copy of it by pressing Ctrl or Cmd + J and reduce the copy's opacity to 50%.
Next, we'll add a highlight spot, which gives the appearance of a sun flare on the helmet's glass.
Make the top layer active and click the New Layer icon to make a new layer.
Change its Blend Mode to "Overlay" and name it, "Highlight".
Open your Brush Tool and Brush Picker.
Make its Size: 250 pixels and the Hardness: 0%.
The Opacity and Flow are both 100%.
Place your cursor halfway over an edge of the face and click once.
Feel free to reposition the flare by pressing "v" to open your Move Tool and dragging it.
Next, we'll add the text.
Open your Horizontal Type Tool and if you want to use the same the font as in the real
poster, open "UVF Bourgeois Medium" for which I provided the link to.
Make its Size: 68 points, Sharp, Center Alignment and white for the color.
Click the "Character/Paragraph" panels icon.
If you don't see it, go to Window and Character.
Make its "Leading"; 106 points.
Leading increases or decreasing the amount of space between lines of text.
Make its "Tracking": 140.
Tracking is the amount of space between letters in a word, line, or paragraph.
The Horizontal and Vertical scales are 100%.
Click on your document and type out your text.
To center it on your poster, click the Move Tool and press Ctrl or Cmd + A to select your canvas.
Click the "Align Horizontal Centers" icon and the "Align Vertical Centers" icon.
To deselect it, press Ctrl or Cmd + D.
This is Marty from Blue Lightning TV.
Thanks for watching!


 For more infomation >> Джейми Каррагер анализирует оборону Ливерпуля [СУБТИТРЫ] - Duration: 1:32.
Không có nhận xét nào:
Đăng nhận xét