Hello, and welcome to another episode of The 8-Bit Guy.
So, today, I'm going to be doing another computer restoration project.
Now, I am well known for doing computer restorations and most people assume that I know what I'm
doing.
And for the most part, I do.
However, not today.
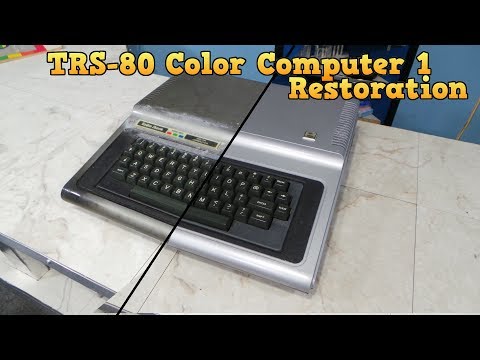
Today I'm going to be working on an original version 1 Tandy Color Computer.
Now, this thing is in terrible physical condition.
It does work, but it has seen much better days.
Now, the reason this is going to be a challenge is because this is not the traditional style
of restoration work that I'm used to doing.
This is painted plastic.
Believe it or not they used to paint plastic computers back in the 1970s which is…
This might be early eighties, I don't know.
Anyway, either way around, so retrobrite is not going to help me out here.
So I'm going to clean this thing up.
And I have a sneaking suspicion I'm going to wind up having to sand it down and repaint
it.
Which is something I've never done before.
So, by the end of this video we may end up having a lesson on what not to do.
But either way around, I'll learn something and you'll learn something whether I destroy
it or hopefully it will come out looking good, though.
We'll see!
I don't think I'll be holding on to this box, it's in really bad and brittle condition.
It says to save this to save this carton for transit, but it's not even in good enough
shape for that.
The Styrofoam instead is actually in decent shape, though.
OK, so one thing I should mention right away is that this keyboard is actually not original.
The first generation Color Computer came with a chicklet keyboard that was notoriously terrible.
So some people opted to replace it with this aftermarket keyboard.
And it's a pretty decent keyboard with real switches in it.
If you look at the Radio Shack catalog for 1981, you can see what the original keyboard
would have looked like here, and that the 4K version like this one was selling for $399,
although you could get a 16K version as well if you wanted to spend a little extra.
I have no idea what this gunk is on top.
Whatever it is, doesn't want to come off.
Down here, you can see the paint is totally rubbed away where the bare plastic is showing
underneath.
I suspect this would have been from somebody's palm sitting there day after day like this.
So this computer probably got quite a bit of use.
Up here you'll notice it has the 4K RAM badge, which means this is one of the very
first that came out in the year 1980.
The first thing I need to do is disassemble this computer.
One of the fist things I noticed when I pulled the top off was this crazy wire for the top
LED.
This did not look like a factory wiring job.
Yep, this was also aftermarket.
In fact, I didn't even realize at fist that this model of computer doesn't even have
any sort of power indicator from the factory.
And since they didn't give any sort of disconnect, I had to desolder this LED so that I could
completely separate the top from the bottom.
I also noticed this little spacer here.
My guess is the original keyboard probably sat there and with the aftermarket keyboard,
they needed to fill the gap.
I also noticed that the labels for the ports on the rear were painted on and at this point
they were nearly worn completely off.
Here's that LED up close.
It actually fits well with the style of the computer, I didn't even notice that it was
an add-on.
But you can clearly see it is just a panel-mount LED and somebody drilled a hole through the
case and mounted it there.
I decided the first thing I should do was remove it, though.
I thought that will make it easier to restore this top piece.
Next, I removed the 4K RAM badge.
4K was not a lot to brag about even in 1980.
The main badge proved to be a little more difficult to remove.
The bottom is made of a thin layer of aluminum.
So even once I got the corner free, I didn't want to just pull on it because I was afraid
it would crease the metal.
But I eventually worked it off with a screwdriver.
It did end up bending it some, but I was able to bend it back into shape.
There was a lot of sticky goo on the bottom of this thing, so my first line remedy for
this is to use WD-40 and let it sit on there a while.
Whenever I clean a computer, my first line product is glass cleaner such as Windex.
In this case, I had doubts that it would help, but I figured I should start there.
It did take off a lot of that white powdery looking stuff, but that was about it.
I don't think there's anything that can be done to make this paint look better, especially
down here by the palmrest.
The right side of the palmrest looks pretty bad too, but not as bad as the left.
All right, so alcohol is usually my second go-to product when cleaning a computer.
And after scrubbing for a little while, I noticed it was making the top look a little
better, but that's because it was actually taking the paint off.
Since it was just a thin layer, it made it look better.
That might have actually worked well on the entire computer, except the fact that so much
of the paint was missing down here.
In fact, when I scrubbed down here, all it did was make it worse.
The paint in this area was already so worn that it was eager to come off.
I turned my attention back tot he badge for a moment.
The goo was still not wanting to come off, so I ended up giving it a second spray of
WD-40 and put it aside for a while.
As an experiment I wanted to see what baking soda would do.
I've had fantastic results with this on some computers, but I've never tried it
on paint before.
I was sort of hoping it would would take a layer of paint off and make it look better,
sort of like when you use rubbing compound on a cars.
I actually even thought about using some car products on this.
Anyway, the baking soda was having no effect here.
Ok, so I decided to use oven cleaner.
I've never used this before, but I read online that it works well for removing paint.
You might ask why I didn't use paint thinner or acetone.
Well, either of those would have likely melted or damaged the plastic.
Apparently oven-cleaner won't do that.
At first I just tried spraying it on and wiping it off.
That seemed to remove a little paint, but not much.
So, I decided to try it again only let it sit for 10 minutes first.
The results were a little better, but not much.
So, I sprayed some more and decided to let it sit for 30 minutes.
In the meantime I turned my attention back to this badge.
I eventually realized the reason I couldn't get the adhesive off was that they used double-sided
tape to hold ot on.
Unfortunately, the tape wouldn't peel off in one go, but I worked at it for a while
and managed to get it off.
After 30 minutes, the paint seemed to be coming off a little easier.
It seems I was on the right path at last.
So I coated the whole computer in this stuff and let it sit for a while.
After an hour it was sort of bubbled up, which means the paint was coming off.
I decided the best way to rinse this was with the house outside.
It was already raining anyway, so this definitely wasn't a good day for retrobrite.
After letting it dry off, you can see the paint was significantly deteriorated, but
still seemed to be hanging on.
I decided to give it another go and see if it made any difference.
OK, so after several more applications this is kind of what we're left with.
It still hasn't removed the paint completely.
You can still see down here the original plastic underneath and you know, if you look at this,
I can just scrape this stuff away with my fingernail, but there's got to be an easier
way to get the rest of this stuff off of the system.
I decided to try a brillo pad, which is made of steel wool.
I started on this area where the paint seemed to be the weakest.
And the good news is, it did work.
So I got to work on the rest of the case, although I had a feeling I was going to feel
like the Karate Kid by the time I was done with this thing.
So here's the result after rinsing.
It made a lot of good progress on the palm rest and up here.
But the top is putting up more of a fight than I expected.
In the meantime, I went to the hardware store to find some spray paint.
I really had no idea what kind of paint would work best, pretty much everything claims to
work on plastic.
My biggest concern is not so much whether the paint will stick, as much as whether or
not it will react with the oil from my skin.
Many years ago before I knew about retrobrite, I tried painting on old computer that had
turned really yellow.
At first it actually looked pretty good.
But, after a very short time of using the computer, everywhere that my palms had touched
the palm rest, which was now paint, turned a nasty shade of brown.
And so I've never painted another computer since.
I ended up picking these two colors, and I thought I'd test it out another piece of
black plastic to see what they looked like.
So, this is the lighter color of gray, and then here's the darker color.
The dark gray is spot on, but the light gray is a bit lighter than I expected.
When comparing to the actual computer, the light is a bit too light and the dark is a
bit too dark.
The original color is somewhere in between.
However, I noticed when looking at this inside lip of the plastic, where it's never been
exposed, the color is slightly lighter and actually does tend to more closely match the
lighter color paint.
So I think I'll go with that.
In the meantime I thought I should clean up the bottom half of the computer.
It's really not that bad, actually.
It just has some dust collected on the bottom.
I decided not to paint the bottom plastic for the time being.
I wanted to see how the top piece turned out before I made up my mind.
So I just vacuumed the dirt out of the bottom and then proceeded to clean the keyboard.
And even the keyboard was not really that dirty, so rather than popping off all of the
keys like I normally would, instead, I just used another method that I've used many
times in the past and works for mild cases like this.
Essentially I just use windex to clean off the top of the keys, then I fold the wet paper
towel in half and run it down the horizontal spaces between the keys.
For the vertical spaces I use a flat tipped screwdriver to help run the wet paper towel
between those keys.
While we have it open, lets take a look at this logic board.
I see more of what appears to be some aftermarket work done here.
And, I'm pretty sure these RAM chips have been upgraded from the originals.
I suspect this machine has 32K now.
Taking a close look, this is the Motorola 6809 CPU.
This CPU was also used in the Dragon computers, the Vectrex, and several arcade machines of
the time.
This is the 6847 Video Display Generator.
This is the same video chip that was used in the Dragon, Laser 200, Acorn Atom, and
other machines too.
Over here is the SAM which stands for Synchronous Address Multiplexer.
The easiest explanation is that it handles memory addresses for the CPU and video chip.
These two chips here are called P.I.A. and they are essentially general input/output
chips for things like the keyboard, joysticks, etc.
Up here we have two ROM chips, and down here we have 32K of RAM, which was originally 4K
in this model.
This power cord is pretty nasty, and it has a lot of paint or something on it.
A lot of people don't bother cleaning cords but if they feel nasty, I have to clean them.
And just so you can see how much dirt was on this thing, take a look at my paper towel
after a few seconds of cleaning this thing.
Unfortunately, I wasn't able to get the paint off easily so I'm not going to worry
about that right now.
I would probably replace the whole cable before I spent too much time on that.
This is the best way to store cables that you care about, though.
That way it doesn't have any kinks in it.
Alright, so I finally had the case down to the bare plastic.
It was time to start masking this thing off.
But I found myself somewhat confused because if you look at this area here, and then look
at the original photos of the CoCo1 you'll see it was painted along with the rest of
the case.
But if you find a photo of the very early models you can see this area was in fact not
painted.
So I got out my masking tape and started masking off the black area.
I had also thought about filling in the hole where the LED was drilled out with some epoxy.
But then I realized that this machine was never going to be factory original again because
of the after market keyboard and the RAM upgrade, so I decided to leave the LED as well.
I also needed to mask off this cartridge port door, since it's supposed to stay black.
OK, so here comes the first coat of paint.
I'm not very good at painting.
And to make matters worse it was windy outside.
I stayed far back from the computer, even if it meant wasting a lot of paint and taking
longer to get it done because my biggest fear at this point was having a run, which looks
really tacky.
I actually ended up applying 3 coats about 30 minutes apart.
And this is how it looked after the 3 coats.
I also decided to follow this up with a clear coat.
I'm hoping that will help with the issue I described before where my hands discolored
the paint.
I applied two coats of this stuff.
OK, it was finally time to peel off the masking tape and see how this was going to look.
Not bad, actually.
I decided to use double-sided tape to hold on the badge, since that is how they did it
from the factory.
This stuff was actually just about the perfect width for this badge.
This one needs no tape since it is held in mechanically.
I also cleaned up this LED some since it had that white powdery stuff on it.
And there we have it.
That actually looks quite good compared to before.
I actually kind of like the two tone look of the plastic on the side now.
In fact, take a look at this picture I took before, and compare to how it looks now.
OK, so it's time to connect this thing up and test it.
Notice there are no labels on the back anymore.
I might be able to fix that.
I'll also plug in a joystick.
I have one of these annoying little joysticks.
OK, let's fire it up.
And it works!
Let's check the RAM and see what it says.
OK, so it reports back 24K for BASIC, but I am still pretty sure it is a 32K machine.
I'll stick in a cartridge.
I only have two games, and both of them are pretty lame.
But it's all I have for the moment.
This is some sort of maze game, but I haven't figure out exactly how to play it.
The other game is a football game and I can't figure out how to play it either.
I decided to use my label printer with these special clear-backed labels as a replacement
for the labeling on the ports on the rear of the machine.
And you know, it doesn't look perfect, but it turned out pretty good.
This computer certainly looks a lot better than it did, but it's never going to look
factory original.
You know, that's kind of one of the interesting things about this computer.
It kind of tells a story.
Now, I have no idea who owned this computer before, but it's obvious whoever owned it
was a serious CoCo user.
And I don't mean just for playing games, because otherwise I don't think they would
have bothered to replace the keyboard, upgrade the RAM, and add the LED, and the sheer fact
that they had rubbed the plastic, the paint off of the palmrest suggest they spent a lot
of time typing on this computer.
So, I'm kind of interested to know what it could have been used for for that much.
Someday, I wouldn't mind coming back and adding a composite video output to this.
That's probably the most useful hack you could do to it today.
Also, for those of you who are interested in CoCo stuff, I've actually been collecting
quite a bit of it lately because I'm hoping to do a full episode devoted to the entire
line of CoCo computers and hopefully you'll be seeing that later this year.
In the meantime, stick around and thanks for watching!


 For more infomation >> CONEXIÓN MADRE TIERRA Y PLASMA desde la Bioenergía Aurea - Duration: 7:09.
  For more infomation >> 05 Tipos de Jogadores de Fliperama - Duration: 9:27.


 For more infomation >> Panasin Mobil - Fideo Tanpa Vaedah - Duration: 0:55.
 For more infomation >> Seneste nyt:Yoona Names The Most Difficult Girls' Generation Dances - Duration: 1:05.
Không có nhận xét nào:
Đăng nhận xét