-------------------------------------------
Message vidéo de The World Standard - Duration: 0:38. For more infomation >> Message vidéo de The World Standard - Duration: 0:38.
 -------------------------------------------
Thanks to all supporters. Our benefit concert for Nejmeh and Baara was a huge success! - Duration: 1:14.
Hello. We are Rosalie and Angelina from 11 WIE DU (Change Pop Band).
Today we want to give you a quick review on our last "One World Family" benefit concert and say thanks to all other kids who supported this action.
About 300 kids attended our concert and donated more than 400 EURO
And very many of you have written a letter or drawn a painting which we found super nice...
... and especially Nejmeh and Baara will appreciate this once they receive it.
Now we want to drop a super huge "Thank you!" to some very special supporters of our show.
Our special thanks goes to all the choir singers from the Hirschbergschule and from the vocal school "Wege der Stimme".
Thanks also goes to the youth marching band of Aufen, who helped us out on very short notice.
Not to forget the dancers of the hip hop formation "Dela Soulys" from Donaueschingen.
And last but not least thanks to all the child of nature kids who supported our show with their video messages...
... from the Philippines...
... from Kenya...
... from India...
... from Germany...
This march we will have the unique opportunity to travel to Lebanon and visit Nejmeh, Baara and all the other kids at their camp to hand over all your drawings, letters and donations.
Of course we will film our travel so that you will be able to follow this story.
Let's unite and help each other to become one world family.
Bye!
-------------------------------------------
JARABE DE PALO - TÚ ME HACÍAS SONREIR (50 PALOS) - Duration: 3:20. For more infomation >> JARABE DE PALO - TÚ ME HACÍAS SONREIR (50 PALOS) - Duration: 3:20.
 -------------------------------------------
毎日駅まで飼い主を見送り、帰りも駅で出迎えする忠猫【いい話】 - Duration: 2:21. For more infomation >> 毎日駅まで飼い主を見送り、帰りも駅で出迎えする忠猫【いい話】 - Duration: 2:21.
 -------------------------------------------
Top 10 Bollywood Heroines Who Went Fat To Fit | 2017 - Duration: 3:23.
Top 10 Bollywood Heroines Who Went Fat To Fit | 2017
-------------------------------------------
The Daily Project - Guided Tour - Duration: 29:15.
Welcome to the tour of The Daily Project!
In this video, I will guide you through the workflow and the basics
to get you started in no time to manage your projects.
to get you started in no time to manage your projects.
When you first start The Daily Project, make sure
to select your preferred language. We'll be adding
more and more languages in the near future.
If you haven't done so already, create a new account
first. It only takes a few seconds,
all you need is your email address and a password,
nothing else required. So, let's get started!
nothing else required. So, let's get started!
First we'll take a quick look at the structure
of The Daily Project. The top of the screen is
made up of the navigation bar, where you can jump
to the different sections. On the top left, the blue
icon brings you back to the home dashboard,
where we are currently located. This is a great place
to start your day and see what's important.
Next up is the Projects area, the core
of the program. This is where you manage all your
projects and group them up. The three smaller
buttons are quick access links to your most important
pillars, more about that later.
The other big part of The Daily Project is
the Categories area. This is a completely separate
Task Manager, to manage all your to-dos,
which are not related to projects, and fit better into
categories. The today and overdue buttons
link to the tasks, which are either behind in schedule,
or due today - and you can also
set up and manage recurring tasks.
Whenever you need to find something quickly, we've built in a
global search function that finds anything in your data
instantly, whether you're searching for projects,
categories, tasks, notes, it's all here
just a click away. The right side of the
navigation bar consists of the help section,
where you can find useful information on how to
handle the program, and the settings where you can
customize The Daily Project to your personal needs.
Your selected view will be shown in
the main area in the center of the screen,
this is where the actual work gets done.
Finally, at the bottom of the screen you'll find
the status bar, where you will see notifications
and additional controls, like the global stopwatch
settings, trash, archive and logout.
Let's start to add some projects!
Clicking on the Projects button in the navigation brings us
to the main projects screen. It's still empty,
and it asks us to create a new Pillar.
So, what exactly is a pillar?
In The Daily Project, a Pillar is basically a container,
or a group for your projects.
Think of it like pillars in the real world, they are tall
and consist of stones stacked on top of each other.
Here, our pillars are stacks of projects,
which can also be referred to as stones.
To make it a bit clearer, let's start
by adding some Pillars and projects.
First we click the "Add New pillar" area
in the center of the screen to create our very first pillar.
We now have the option to add more
pillars either to the left or right side,
so let's do that. In case you want to
change the order, just drag them in the title area
and move them around. You can rename a
pillar by right-clicking the title.
Now that we have pillars, let's fill them with some
projects. Click the center of the pillar
to bring up the new Project dialogue.
You can assign it to any pillar you want,
and set your start and end date.
Not all projects need deadlines, but we'll get into that
later. You can also make the projects
minimized if they are not important yet, and we'll
see how that looks in just a bit. Project heights
are usually relative to their length in time,
but in case you want to change it, you can do that here.
To add more projects, use the top left
plus sign, and we'll add a few more to fill the pillar.
plus sign, and we'll add a few more to fill the pillar.
If we add a project that has a future
start date, it will be shown differently in the pillar
and indicate the scheduled start.
Projects are automatically arranged by date,
feel free to move them around to change the order.
Let's say Corporate Identity is not our priority
right now, so we can minimize it either by
setting the minimized check mark in the project dialogue,
or simply by clicking the icon in the top left corner.
or simply by clicking the icon in the top left corner.
Not all projects have deadlines.
If you want to set up an infinity project, simply
right click on the project to bring up the dialogue
and deselect the deadline option.
As we are adding pillars, you can now see that
the 3 buttons below the projects button in the
navigation have been filled. Those are
quick access buttons to each pillar, and we can
customize which pillar we want by right clicking each
each button and selecting our favorite.
To rename a project, simply bring up the dialogue with the
To rename a project, simply bring up the dialogue with the
right click and enter a new name.
Our Projects screen is still a bit empty,
so let's jump ahead and look at a more complete setup
so you can get an idea of what to expect.
Now we have 5 pillars with fully active projects.
Let's go through the information here.
First, let's revisit the concept of pillars.
As you can see, we have 5 pillars,
which group up the projects in context, so it's
easier for you to manage specific areas at once.
You can see how many projects, or
stones, are building a pillar.
Then we have colors. Looking at the pillar on the left,
you can see green, red and yellow. Green means
you're on track to meet your deadline,
yellow means it's getting problematic, and red
means that you will miss the deadline unless you prioritize
and increase the speed of completion here.
This is a great way to help you make decisions on where
to focus. The projects have a progress bar,
which you can see by the darker color, and the
percentage sign on the bottom.
The last 2 projects on the left pillar are already
completed, and therefore pushed to the bottom with a
check mark. We talked earlier about projects
without a deadline, and here is an example.
It will appear in slightly darker green
and will not change colors. If you have a red
project with an exclamation mark in there,
it's a problem. That means this project has
already missed its deadline and is overdue.
This should be the absolute priority now.
Inside the project status bar
you can see either a T or an S, in red
or blue. They stand for tasks and
sub-projects which are due today (in blue)
or overdue (in red).
So now that we know how to create and organize pillars
and projects, how do we fill them with tasks?
Let's create another project to go through the basics.
Enter a project by clicking on it.
Here we are in the inside project view.
On the left you can see the pillar it belongs to,
with all the other projects greyed out. You can
easily switch between projects in this pillar by
clicking on them. So let's add some tasks.
We can either use the plus sign on the top right
or the textbox on the top to do so.
Tasks can have nested subtasks.
To add a subtask, click the plus sign
on the left side of any task.
You can also add subtasks with the correct title directly
You can also add subtasks with the correct title directly
from the text field, so you don't have to rename them later.
Simply select the task you want to nest
them under, and change the entry mode at the top
from New Task to Subtask
by clicking the button with the arrow down.
You'll notice the reference task gets marked
and now you can type and add the subtasks.
The same works for nesting a subtask
below another subtask.
Top-level tasks with subtasks in The Daily Projects
Top-level tasks with subtasks in The Daily Projects
are called sub-projects. You can collapse
and expand individual nested tasks
with the arrow down button on the task itself,
or use the arrow on the top right to
expand or collapse all tasks in the current project.
expand or collapse all tasks in the current project.
To rename any task,
simply right click the task title and type in the new name.
simply right click the task title and type in the new name.
Now let's change the project
start and end date to showcase the
change of progress better.
The project turned red now, as the start date is a few weeks ago
The project turned red now, as the start date is a few weeks ago
and we haven't completed anything yet.
To complete a task, simply click the check mark,
and you'll notice how both the progress bars on the
project and the color will change according to the
progress relative to the deadline. Completing
a task will also autocomplete
all the nested subtasks. Next
we want to assign due dates to some of our tasks.
To do so, simply click on the empty grey
area on the right side of the tasks, and pick a
date using the date picker.
You'll see how the project shows a blue S, which means
a subproject is due.
Remember, Top-level tasks with nested subtasks
are referred to as sub-projects.
In The Daily Project, blue always refers
to due today, while red always refers
to overdue. The overdue tasks will
show the amount of days overdue, in this case
3, and future due dates will indicate
how many days are left.
Now that we know the basics of adding tasks,
let's jump straight into another project in the same pillar.
let's jump straight into another project in the same pillar.
You see a few more icons
on the tasks, and we'll go through all that in a bit.
but first we start with basic navigation.
You can use your keyboard to navigate the
tasks, as well as collapse and expand the
subtasks. Simply select a task by clicking on it,
and then move up and down with the arrow keys.
To expand a task with subtasks, press
the right arrow key, and the left arrow key on the
task collapses its children.
Moving tasks is simple too. Let's create one to move around.
Moving tasks is simple too. Let's create one to move around.
Moving tasks is simple too. Let's create one to move around.
You can simply drag a task to a
new position, and an arrow key on the left side
will show you where it will drop, either under the task,
or inside. If the arrow is in the center of
the task, it will drop as a subtask.
We can also move tasks with the keyboard. Here
we're on a Mac, so we'll use the Command key and the up
and down arrow keys. On Windows and Linux,
use the Control key and the arrow keys.
Every time you see the Command key used in this
video and you're not on Mac, simply use the
Control key instead. Copy and Paste works
just like you would expect, select a task
and press Command key and C, and you'll see
a marker around the task. Now select a
reference task where you want to paste it, and Command
key and V will paste it under the selected task.
Cut and paste works just the same, using
Command key and X. You can copy
and cut tasks with their whole tree of subtasks if you want.
Now we've already seen the projects
changing progress when completing tasks,
but the same works for tasks with subtasks.
Here we're checking off a few subtasks,
and notice how the parent tasks' progress changes
as well. This is very useful if you have
all the tasks collapsed, as you can immediately see
the progress of the subtasks without expanding
the whole tree.
Let's add some notes to the tasks. You'll
notice some of the tasks have a paper icon on the right side
those have a note attached.
To add a note, simply mouse over the right
side of the task and the paper icon changes to a pen.
Clicking it will open the notes.
If you need more space, simply enlarge the area.
Close the note by clicking the icon again
or pressing escape.
Now we want to add some tags to our tasks.
Click the tag icon on any task, and
enter the tag name, then confirm with enter.
You can also select previously used tags
from a dropdown list. Notice that you can't
add tags twice, as shown here.
To remove a tag, simple right click the
tag directly on the task. Tags make
it very easy for you to filter tasks - we will do that later.
it very easy for you to filter tasks - we will do that later.
Ok, so now we have our tasks, and
subtasks, and we can start managing them.
But sometimes we have to be really strict, and make sure
things get done in the exact order.
For this, we will use sequential tasks.
Pick any task, which has a number of
subtasks, and press the S icon
(S stands for sequential). Note
that there is a confirmation dialogue. When some of the
tasks are completed out of order, it will be adjusted.
Once you press convert, you'll notice how
the look of the tasks changes. There is only
one task active, and it's the only one you can actually
mark as completed now.
Once you do, the next task becomes active.
Notice how on the right side the
tasks are now numbered in order. As you can see,
it's not possible to change the completion status of tasks,
which are not the active one.
You can add some colors to your tasks to prioritize
them or mark things that are important to you. First
let's deactivate the sequential tasks again.
To change the color of a task, click the leftmost area
of the task and select one of the colors, which will
pop out. Colors can be very useful as you
can filter the tasks by them.
Before we introduce the filters, let's talk
about stopwatches. On many occasions
it's necessary to track your time working on a task,
maybe you're a freelancer and get billed
by the hour, or it's just important that you keep
track of how much time has been put into each task.
To add a stopwatch to a task, click the stopwatch
icon on one of the tasks, and select start.
This will create a new stopwatch for the task,
starting at 0. You can see the
stopwatch appearing left of the icons.
To quickly pause or continue a stopwatch, simply
right click on the stopwatch area. When you're
finished, you can either select "Finish" from the stopwatch
dialogue, or just complete the task.
When you complete a task, the stopwatch will be automatically
stopped and marked as finished. The stopwatch
will be shown in 3 colors: red means
it's running, grey means it's paused, and
green shows a finished stopwatch. If you forgot
to start it or just want to adjust the time on a
certain stopwatch, simply select the edit button
and either enter a new time or adjust it with the buttons.
and either enter a new time or adjust it with the buttons.
At the top of the task list, you see
another stopwatch. This is the project wide
stopwatch, which combines all stopwatches
present in this project. To get an overview of
all the individual stopwatches in this project, simply
click on it, and a summary will pop up. As you
might have stopwatches in multiple projects, or even
in the categories, you can open the global stopwatch
summary, which is located in the status bar.
As long as there is one running stopwatch in your
whole program, it will show in red. Here
you see all the stopwatches, from both projects and
categories. You can filter by status at the top,
by project or category on the left,
start or stop them all, or handle them
individually just like you did in the tasks.
Now let's talk about the ways to filter your tasks.
First, we switch the sequential tasks back
on, so we can include those in the filters.
On the top of the tasks you see the filters.
Let's filter out all the sequential tasks.
We can now focus on what we're working on
right now. To disable a filter, simply
press it again.
Next we will filter by
stopwatches. Let's show all the running
stopwatches. Looks like we don't have any right now,
so we'll quickly activate one by right clicking, and use
the filter again. The same applies to the paused
and finished stopwatch filter.
Next let's filter by overdue tasks, so we can finally
Next let's filter by overdue tasks, so we can finally
get rid of those tasks on which you are behind.
Note that if a filtered task is nested
below another, it will still show the parent task
so you know where it belongs to, even if the
parent doesn't match the filter. Filtering by tasks
due today works just the same, so you can see your work
for the day. You can show all tasks
scheduled for a future within a certain time frame
with the future filter.
The color filter is very useful to filter by your very own
The color filter is very useful to filter by your very own
customizations. You can not only combine
those color filters; you can combine any filter
you want. If you want a clearer view of the tasks,
you can switch of the tags with the tag icon.
To filter tasks by text, simply use
the search box on the top left side. Notice
that this search applies both for the task title,
as for the tags. So it's a great way to filter
by custom tags.
As pillars are used to group projects together,
let's get an overview of how we're doing for the whole pillar.
Click on the statistics icon at the top,
and it will jump to the statistics screen.
These statistics apply to all the projects
inside of the current pillar. You can also reach
this by clicking on the pillar title. Remember the
pillar shortcuts we've set at the very beginning?
You can use those to quickly jump to an overview with the
statistics for your favorite pillars, and from
there easily jump into the projects.
So, all this time we've been talking about pillars
and projects, and navigated only in the project view.
What do we need categories for?
Categories represent a completely separate Task
manager in the classic sense, where the tasks
are organized by categories instead of pillars and
projects. While a lot of tasks are part of
a project, not all of them fit there.
Many tasks just stand on their own, and while
they can be grouped and categorized, projects might not
make sense there, as a project is usually
something with a start and end date. So consider this
a separate manager for all those things that either
don't fit in projects or that you simply don't want
there. It's just great to have them all in one place
together, so you don't need to switch apps for tracking those.
Below the main button you can see the link
for today, which shows how many tasks in the
categories are due today, overdue - which shows how
many tasks you failed to do on their due date, and
recurring, where you can set up recurring tasks.
Let's jump into it and take a look.
As you can see, the right task area looks the same as it does
in the projects. The functionality for the tasks
is basically identical. If you know how to
handle your project tasks, you will have no problems here.
On the left side, instead of a pillar full of projects,
we now have a list of categories. The blue
number on the right shows the amount of tasks due today
in that category, while the red number stands for
the overdue tasks.
Let's add a new category!
Just like the projects and pillars, simply drag it around to
move its position, and rename it with a right click.
Now we could start adding tasks just like
in the projects.
We will not go over the handling of the tasks
here, as it's exactly the same as the project tasks.
All the same filters are available too.
In the navigation bar under Categories you can
see the today and overdue buttons,
with numbers in blue and red respectively.
The numbers are referring to the amount of due tasks
today and overdue tasks in all categories
combined, as you can see here on the left side.
Clicking the today link, it will bring up
a view with the tasks due today from all the
categories, and the related category is shown here
on the task. The overdue filter
works exactly the same way.
Now let's talk about recurring tasks.
The button in the navigation brings us to the recurring
tasks screen. Here you can create and manage
all the recurring tasks for each category.
As you can see, we currently have 3 recurring tasks
in the Personal category. Let's take a look.
On the right side, where the normal tasks have
their date field, we find the information about the recurring
cycles. When we move the mouse over the field,
we get additional information for the next occurrence
and the end date, if set.
We're going to create a new recurring task in the Travel
category. Just like the normal tasks, you can
add them either by using the text field
or the plus-button.
Now we're adding the
name, and we can set the start date, but we'll
just leave it at today, so it will spawn right away.
We'll pick an end date far away, and we
can use the calendar's month and year jump to
get there very quickly.
Just set the interval
period and we're done.
As you can see,
it just created a new recurring task with our
specific settings.
Let's head back to the today
filter to see if it got added. And there it is,
at the bottom.
Ok, so now we've talked about how to easily
see the tasks for due today and overdue in the
categories. But what about projects? Those have
due tasks as well. Let's quickly head back
to the projects to take a look.
Inside the project view, we can see the indication for
overdue and due tasks as well as sub-projects
on the project itself. But when we jump into
the project, we see a lot of overdue tasks here.
So how do we see all those tasks filtered
out nicely that we can act on it?
This brings us back to where we started: The home dashboard.
When we started the app for the first
time, it was obviously empty, as we didn't enter any
data yet. Let's head back over there again.
The home dashboard is now filled and it's a
great place to start your day. It filters out all
the important information and it helps you decide
what to tackle first. As you can see on the left
side, three pillars are shown. We have
5 pillars in total, but the ones shown here are
our selected favorites, the ones we set up earlier
in the navigation under projects.
You'll notice that all the projects are greyed out, and
only the red ones are shown in color, to amplify
the meaning of a critical status. Remember,
a red project means you're going to miss the deadline
unless you make some extra effort or adjustments.
A great way to filter them out quickly.
Moving the mouse over the pillar titles will put the color
back to the projects so you can still get an idea
how the rest looks like.
Now, on the right side,
there we have the summary of the tasks due today
and overdue, from all of our projects.
This way they're always easily accessible
right from the start. But which projects do they
belong to? You can enable the project
origin label on the top of each container.
Another way to show the project origin is to move the
mouse over a certain task, and the corresponding
project on the left will be automatically highlighted
while all the others will be greyed out. This
way you can easily spot where the task is coming from.
It works the same way for the projects.
If you want to know which tasks are due in a specific project,
move the mouse over the projects and the
tasks on the right side will get filtered.
Of course, clicking a task will jump you directly to the project,
with the selected task expanded into view
and preselected.
Now that we know how to manage our projects and categories,
we need to learn how to find things quickly, especially
if we don't remember where it is. That's where the
global search comes into play. The search bar in
the center of the navigation let's you instantly find
anything, anywhere. You can search for projects,
categories, pillars, tasks, recurring tasks,
or inside notes and tags. Let's try it.
or inside notes and tags. Let's try it.
You can navigate the results with the arrow
keys, or use the mouse for scrolling.
We can find text in tags, as you can see here.
We can find text in tags, as you can see here.
The search even looks inside Notes.
The search even looks inside notes.
You can change the search priority in the settings, and also exclude
You can change the search priority in the settings, and also exclude
certain parts of the program from searching if you don't
need the results there.
And just like you would expect,
clicking an element will jump you right to it.
In order to navigate the app quickly, you can
also use the shortcuts. As we like to forget
those quickly, you can enable an on-screen overlay
which displays the available shortcuts for
every single screen. To show the shortcuts,
either use the button on the status bar, or press
the option key on the Mac. Windows and Linux
users can use the ALT key.
The available shortcuts will show on the screen.
Let's go back to the home screen using a shortcut.
Let's go back to the home screen using a shortcut.
Notice that you don't need any modifier key,
just press the single key. Now let's go to projects.
just press the single key. Now let's go to projects.
You'll see that you have an option here for left or right
pillar. The favorite pillars are accessed by the
numbers 1 to 3. You can of course customize
all those shortcuts in the settings.
If you quit the program, or restart your computer,
don't worry about forgetting your stopwatches, you'll get
a chance to manage and stop them if you wish to do so.
Thank you for watching, and I hope you enjoy "The Daily Project".
Thank you for watching, and I hope you enjoy "The Daily Project".
-------------------------------------------
LEARN COLORS with 3D BALLOON for Kids - Colorful Plain Video Learing For Children - Duration: 2:09.
LEARN COLORS with 3D BALLOON for Kids - Colorful Plain Video Learing For Children
-------------------------------------------
My Edited Video - Duration: 0:50.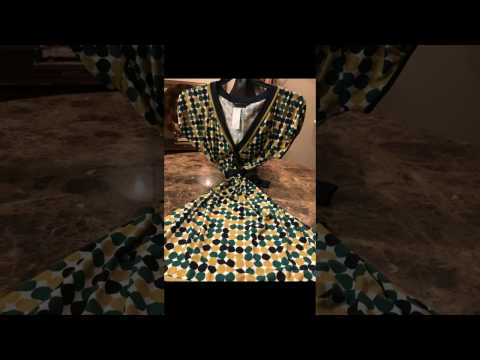
dreamchicfashions.online
-------------------------------------------
Gigi Hadid gets Birthday kisses and Surprises from Zayn Malik - Duration: 1:28.
Gigi Hadid definitely had one of the coolest birthday with her near and dear ones.
She turned 22 on sunday and celebrated her birthday with utter style.
She started her day with water-painting and reliving her childhood with sister Bella Hadid.
Bella had all their artwork posted as her Insta - stories Zayn Malik made her day even special
with cake, kisses and lots of fun.
In one of the pics she posted on Instagram she was seen sporting a huge smile as she
held a yummy-looking peach coloured birthday cake as her beau planted a kiss on her lips.
The birthday girl enjoyed a late afternoon helicopter ride along with Zayn as well as
BFF Hailey Baldwin.
The supermodel showed off an array of gifts including boxes of red roses which came partially
from her sister Bella Hadid's Ex Abel Tesfaye.
No wonder she is loved by all and had one of the best birthday ever.
-------------------------------------------
(eng sub) get ready with me : orange brown make up - Duration: 12:07.
today, It's a video of
get ready with me!
let's do it.
the way I made my hair curled.
curling without iron.
I'll do that again
let's start with my hair.
ohohoh
again.
I did it.
yeah!
oh, it's cute.
first, let's curl my forehead hair.
and then,
the mist I've always used,
is empty,
so let's start with sun cream.
apply it on my face.
nature republic province calendola sunblock
today,
I'm gonna eat pancake.
in garsosu road.
original pancake house.
I thought it was only in itaewon, but there was also in garosu road.
I'm so excited.
it's important to apply sunblock.
I saw a story of some truck driver.
our driver seat is located on left.
then sunlight will affect left side of his face.
the left side, affected by sunlight.
this side
ages very fast.
but the other side is not aged fast.
so everyone, please apply the sunblock!
why am I leaving things there!
oh.
then, let's use this stick foundation on my face.
meme box I'm meme multi stick.
anyway,
please tell me, recommend me some things
in duty free shop.
I'll go duty-free shop later.
I always use cheap, road shop cosmetic things.
like my meme box foundation.
but I use expensive lipstics
nowadays.
it's okay with basic skin care products.
please recommend to me anyway.
and..
why does it
break always.
and then
missha
signature essence cushion
intensive cover.
no.23
apply on my face fa fa fa face!
chop chop chop
cushion,
I once bought HERA's cushion.
but cheap missha's cushion was also
good, so I'm using it
I don't know whether the expensive things are much better than road shop.
and I can't skip here..
and let's conceal some flaws.
tonymoly face ton creamy tip concealer
I'm on my period,
so my skin has many flaws. let's conceal.
my skin was terrible with many flaws.
big acnes.
after being adult,
I have small flaws.
and then!
unpretty rapstar!
my friend gave it for my birthday gift.
It's almost worn out.
so I bought a famous shading kit of 'too cool for school'.
duty free shop is so good.
I can use some points on online duty free shop.
at very cheap price.
sharp chin!
also cheek
I'm so happy because of pancake.
I'm thinking of buying Mac chilly lipstick.
do you think it's good color for me?
(but I already bought it)
and nose time.
and I also bought a brush of Mac,
because I cannot do this same all the time sophisticatedly.
and clean with natural color.
I'll wear new blouse and pants
what jacket should I wear on them!?
draw eyebrow quickly.
eyebrow, which is not on sale now.
I didn't draw eyebrows well.
so it's almost new one.
and now!
what I'm gonna do with eye make up.!
ohh.
innisfree mineral no sebum powder.
I want to have a big and long eyes.
the eyes would be good to do eye makeup.
actually
I like my eyes.
as time goes by,
eye shadows are always stuck in my eye lids.
at first, apply this bobby brown eye shadow.
toast color.
I'l show you the color.
(sorry for the finger. it's not a negative meaning)
this one is also a purchase from duty free shop, during my Europe trip.
spring spirit.
but my outfit of today is all black color.
it's okay, only my face has to be pretty~
missha modern shadow gold awards.
I'll use this brush!
ah
oh, blusher,, I'll use cheek blusher later.
oh,
I'll use this eyeshadow stick
heimish dailies coralic eyeshadow
on my front side of my eye.
and my favorite color.
coralic granita color.
this color.
blend it.
final..oh, not finally.
coralic brown color.
I'll apply this to look it as eyeliner.
brown color.
sophisticated touch.
touch this like cat eye.
mono eys eyeshadow .
this color.
use this brush.
and finally,
nature republic multiple touch stick.
not much amount.
oh, I skipped mascara.
I have thick and straight eyelash.
so It's no use of doing mascara.
in 1 hour after doing mascara
my eyelash becomes as original.
so my friend recommended me to use mascara fixer.
this is innisfree skinny waterproof mascara (neglecting the flow of telling)
etude mascara fixer is famous.
so I'm gonna buy it.
first, apply this uriage lip balm.
Mamonde creamy lip tint.
balance of velvet red and
red pepper.
first, velvet red color..
I love it because it goes well with my lips.
it's called mlbb.
and now, red pepper.
in inner side.
done!
(so deep, so erasing on my hand)
oh, this session is..
not natural.
I have to comb it.
I really don't need to go hair shop, because this way is so good.
oh, I also bought circle stick iron.
because I cannot go hair shop, because doing bleaching my hair.
oh, this session is too..
now, use the iron!
final step.
wearing clothes.
it looks good.
done!
who's there?
older brother?
okay.
I wore my clothes, what!?
I'll go out soon.
and now, earrings!
all done!
now I have to go out!
then bye bye!
see you next time!
I have to run..
bye!
-------------------------------------------
Öt Kis Kacsa - Dalok Gyerekeknek - HeyKids - Duration: 15:50. For more infomation >> Öt Kis Kacsa - Dalok Gyerekeknek - HeyKids - Duration: 15:50.
 -------------------------------------------
¿Conquistarán el MUNDO las empresas CHINAS? - VisualPolitik - Duration: 14:01. For more infomation >> ¿Conquistarán el MUNDO las empresas CHINAS? - VisualPolitik - Duration: 14:01.
 -------------------------------------------
【Banished】ゆっくり開拓村 Season2 Part2【ゆっくり実況】 - Duration: 10:22. For more infomation >> 【Banished】ゆっくり開拓村 Season2 Part2【ゆっくり実況】 - Duration: 10:22.
 -------------------------------------------
Innovative HotDog Egg Ring - Easy Breakfast Recipe - Duration: 2:29.
Dont forget to Hit the subscribe button its free :-)
-------------------------------------------
Kotka - city by the sea | a day when our DJI Mavic Pro crashed - Duration: 10:42.
We are going to Kotka to meet Ikilomalla vloggers Titta and Thomas
It's a new city for us
But luckily Titta joined us already from Tampere
Great service!
We have our own guide here to show us where to park
We arrived to Karhula market
I heard you can get something called "posso" here
I have no idea what posso is but I'm soon to find out
Can I have two possos please
We always went to get doughnuts at the market
Then they invented something called "doughnut posso"
And it remained as a delicacy of this region
We were on a summer house once with friends away from here
Then we went to the market in the city of Salo like "can I have one posso"
And they were like "what in the world is a posso?"
It's a Kotka thing
In Lappeenranta they have "vety" and "atomi"
In Hämeenlinna they have "lörtsy"
This is Kotka and this is hot stuff
Now I have posso here
It isn't a "piggy doughnut" even though it looks similar
It has apple jam inside and it's coated with sugar
It is delicious
I like it that it's not too thick
Sometimes doughnuts are too thick
And also kind of dry
This is not dry
Posso really is delicious
Very delicious!
Alright, Titta, so where are we now?
We are at the Haukkavuori observation tower
This used to be a water tower and it was built in the early 20th century
The women were monitoring the airspace here during the war
And in the summer they're opening a new restaurant here
Yeah, in a few weeks
And then you can dine on top of the tower
Now we can only watch the tower from down here wearing our hats and cloves
But it's pretty cool still
Now it looks like it's been flown with
Gathering the pieces
There's the enemy behind there
The tree
That one
It looks like it just came back from war
The tables here look cool as well
Yeah it would be cool to do BBQ here in the summer
This place is cool
When did they construct this park area?
Within few years, little by little
Very nice
Moomin house as well
The lighthouses look so cute!
They asked Konsta Punkka to come here and shoot the squirrels
And it was a big thing
People still go there to look for the squirrels that come to you
And take Konsta Punkka kind of photos
Great success
Famous place
Instagram famous
Maritame Centre Vellamo
This harbor area is the area for Kotkan Meripäivät festival
Was it so that this is free on Wednesdays?
Yeah, every Wednesday from 5pm to 8pm
Pretty nice
That one would be awesome
The U135
Boo!
The cruise ships have changed but the beer carts have remained
This one looks pretty much the same as they do these days
Same booze on the table
Gollum
Antti
There are postcards from all over the world
Sent by sailors
You can play Battleships here
Pretty hardcore
This would be cool!
Very cool!
Do you know how to play?
Battleships?
Come on!
What kind of a guy do you think I am?
The people from Helsinki don't probably play it
"The people of Helsinki don't play it"
I sunk your battleship
They play it all over the world!
Here we could get good light for your Instagram photos
You would probably go blind
Wasn't it a nice exhibition?
Yes!
I think so too
Alright so where are we now?
We are now in a traditional local seafood restaurant
Called Wanha Fiskari
Let's go and eat seafood
Nice
This is THE restaurant
Puksprööt!
It is delicious
It's very fresh
When you see the whiskey glass and smell the tar I tough it might be quite rough
But it's actually very fresh
Very nice
Archipelago bread with salmon tartar
It melts in my mouth
Mmm...
When I tasted it I felt like I started drooling
It was a great appetizer
It wasn't a stroke or anything
I chose perch as my main course
It looks amazing
With tzatziki and risotto
There's a huge pile of perch
Pretty amazing
Let's have a taste
Salted perfectly
It melts in my mouth
Excellent
Excellent
How about you?
Absolutely delicious
I'm fighting not to say "mmmmmm"
Mmm!
Thank you Titta and Thomas for an amazing day in Kotka
We couldn't have found these places without you
I will remember this place as a delicious city with gorgeous scenery
Just amazing
We'll return here
It was nice to have you here and do come again!
Bye bye!
If you liked our video, remember to hit the "like" button
Remember to check out Ikilomalla by Titta and Thomas
And remember to subscribe to our channel as well!
-------------------------------------------
3 way to hold a rattan stick ? - Duration: 5:30.
Hello and welcome in this new Arnis Kali video.
Today I show you how to hold properly a stick.
A rattan stick is held according to the distance at which you are.
And not, I hold my stick in a certain way.
There are some schools that will tell you that you grab it exactly like this or like that.
Okay. Because the style in question train at a certain distance.
Holding the stick like this, in Mano Larga style.
The Doblete Rapilon is known to be a Mano Larga style but not that
Mano Larga, the long hand, it wants direct we work at very long distance.
I am very far and I strike with the end of the stick. The tip of the stick.
It is this tip that touches to tear off the skin.
This allows me to strike very hard, from far away, and to have very ample movements.
Inevitably if I am at this distance and hit with just the tip it makes no sense.
I will rather hit with the other end : the PUGNO.
And hold the stick like this.
To hit, but also to hook.
For example, I just block, attack and block, I crochet his arm.
One can be in these distances: very close distance with the Pugno
and the other end in very long distance in Mano Larga.
In intermediate distance, Medio Corto,
we will hold it like this
and instead of coming to hit with the end, I will hit with the middle of the stick.
My targets will be the hands, the face, etc I am really close.
If I am close, I will not be comfortable to strike with the end of the cane.
The middle is more appropriate
and I will keep my shoulder and elbow down for maximum efficiency in typing or blocking.
So if I am far, I will hold my stick at the end, to 1 inch.
But if I am very close, I strike with the other end of stick,
or even like this, like a punch, but with the cane.
The stick is held in relation to the distance.
Another way of holding his stick in rattan, which is not related to distance but to context.
We are going to take the stick in reverse and there I am in a context, a situation of self-defense.
Seen from the outside, one person holds his stick offensively,
and the other defensively with the hands upward, in appeasement guard.
I am protected, I can react, but I am in defensive form and seen from the outside,
I will be the defender and he will be the assaillant.
So in a defensive mode when I am holding my rattan in reverse.
One last catch. I take the cane anywhere and I defend myself.
I can block, hit on both sides if I have it in the middle.
So I see a stick next to it, I'm attacked, I recover it as I can and I use it.
I will not have time to calculate how I should hold it properly.
It is not a real HOLD in the sense of Arnis Kali school.
But more a way of working to get used to defending themselves with any outlet.
After that can represent a rolled newspaper or a magazine and I use it as a mini stick.
If it's a stick and I have it in the middle, I'll use both sides.
Thanks for watching and subscribe tp the channel to miss none of my upcoming videos. Thanks. See you!
Không có nhận xét nào:
Đăng nhận xét