♫ Music ♫
a n t
Đăng ký:
Đăng Nhận xét (Atom)
-------------------------------------------
Mowzey Radio Death music RIP RADIO UGANDA MUSIC CONGO MUSIC Rest in peace brother - Duration: 4:34.
-------------------------------------------
8-Bit Unboxing January 2018 - Duration: 11:16.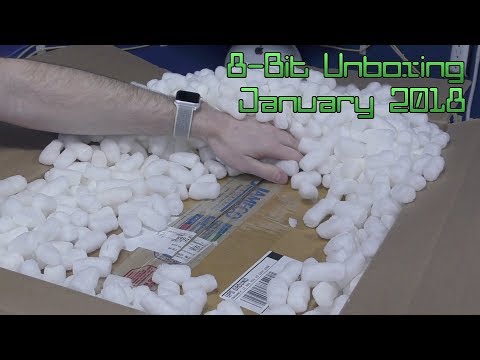
Hello, and welcome back to this episode of 8-Bit Unboxing, where I'm going to unbox
all of the stuff that you guys have sent me during the month of January 2018.
Now, the last 3 episodes I've done of unboxing, I remember thinking to myself, this is going
to be the last episode.
And the reason I think that is because I'm turning down so much stuff, that I just don't
think I'm going to have enough items received to put together to make a good video.
I mean, the video might be 2 minutes long.
So, nevertheless, I've been surprised and each month I've still managed to get enough
stuff in to put together a video and this month is no exception.
In fact, I actually managed to receive several items on my want-list, and some other cool
items as well!
So, let's dig right in!
The first package of the month comes from Michael Lathberry.
Lathberry.
Something like that.
It's quite heavy for its size.
8-Bit Guy, please read?
Ah.. a Commodore 64 inspired design, very nice.
And in the box, we have a loose Iomega ditto drive.
Ok, thank you Michael!
Moving on, I have an apparently anonymous package, since there is no sender name.
Ah, there's a note.
Looks like this is from Billy and it's a bunch of C64 games.
So, a lot of people are wondering why I would be accepting all of these games.
Well, most of the games I had growing up in the 80s were pirated copies.
And even the original titles I had have all been lost.
So, I'm sort of building a C64 software library for the first time.
And while I'm familiar with a lot of these, quite a few of these games I've never even
heard of.
So at some point I'll have to sit down and try them out.
Thank you Bill!
Next package is from C Harmon.
OK, so we have computer magazines.
Rainbow.
That was dedicated to the TRS-80 Color computers.
This should help in the research I'm doing on those for an eventual video.
Since I didn't grow up with those machines I'm trying to learn about them after the
fact.
These are like little time capsules to the past, so this should help a lot!
I noticed these two are from 1984 and 1986, so each one is from a slightly different time.
On the other hand, I'm mystified by the inclusion of this Amazing Spiderman comic.
It appears to be from 1991.
I've never been much into Spiderman, but maybe I'll read it.
Anyway, Thank you C Harmon!
OK, next up is a big ole box.
This one is also an anonymous sender.
I feel like I'm extracting giant insect eggs from a nest or something.
Yeah..
I'm still getting the feeling this is a cocoon of some kind.
There's no obvious place to start trying to unwrap it.
I guess I'll just start slicing into it.
This stuff goes deep.
I'm afraid to cut too aggressively for fear of damaging whatever it is that's inside,
which at this point still remains a mystery.
Now I feel like I'm peeling an onion or something.
Funny thing is, I can actually see the item and still have no idea what it is.
OK, mystery is solved.
It's an MSD dual disk drive for the Commodore 64.
These are pretty rare these days.
This one has apparently been modified some.
So, let's see what's in the smaller package.
Look at that.
It's a CMD Ramlink.
This was an aftermarket memory expansion for the Commodore 64.
These are also kind of rare.
Very nice, thank you anonymous sender!
OK, onto the next package.
This is from Michael Conrad.
I like that font used for The 8-Bit Guy, as I chop right through it.
All right!
Looks like we have Sega Master System games.
As you might imagine, there's a Master System video on the horizon.
He also sent the light gun.
So here's a better look at all of the titles.
I'm looking forward to trying these out.
I especially love the cartridge style of this console!
Thank you Michael!
Next up, somebody sent me a Black&Decker food processor.
Well, let's hope not anyway.
This is from Terry Hitt.
Let's see what's really inside.
Ah yes!
This has been on my want-list for some time.
This is the Timex Sinclair 1500.
But wait, there's more!
The Sinclair personal printer!
Very neat.
But wait, there's more!
Haha.
Let's see what's in this little bag.
It looks like a pocket computer of some kind.
Interesting.
A Casio.
I have not seen this model before, but the screen is larger than I've seen on this
type of computer before.
Oh, it even has batteries in it.
Cool!
Looks like it has a 4 line display.
I would have loved something like this back when I was a kid!
Let's open up the Sinclair 1500 and have a look.
Wow, looks almost brand new.
Very nice, thank you Terry!
Next up is a little envelope from Alex Eisenhut.
Ok.
Cool.
I remember the email about this.
This is a really unusual type of floppy disk.
It's 3 and a quarter inches in size.
I've never seen one of these before.
It looks like a cross between a 5 and a quarter inch disks and the more common 3 and a half.
I'm not even sure what system would use a disk like this.
So, for comparison, here's the two most common disk types from the 80s.
And here's the 3 and a quarter inch.
So yeah, its ever so slightly smaller than a 3 and a half inch.
This will make a neat collectible, thank you Alex!
All right, here's another box.
This one is from Ryan's Game Room.
Looks like another box of Commodore games.
Yeah, looks like a bunch more games I didn't have.
Let's lay them out so they're easier to see.
Interestingly enough.
I have never played or even heard of most of these.
I've played skyfox and Ace of Aces.
The rest are a total mystery to me.
Thank you Ryan!
Up next is a box from Timothy Nelson.
Looks like 4 different Oddyssey2 games.
UFO.
I wonder if this is related to the old TV show called UFO.
I like the way these boxes sort of double like a jewel case.
And yes, there will eventually be a video on this console, maybe sometime this year.
Thank you Timothy!
Moving right along, here's a box from Andrew Koebbe.
Well, here's a power supply.
And some batteries.
And in this smaller little package, there is an Atari Lynx game.
I suppose that answers what is in the other package.
Yep, and here it is, an Atari Lynx.
I've never played one of these before.
Well, since he sent some batteries, I suppose I should fire it up and see if it works.
OK, apparently it won't work without a game installed.
So let's try putting this in there OK, now it is coming to life.
Odd, I wasn't expecting that you could play this thing sideways but it appears this game
works in portrait mode.
OK, well, thank you Andrew.
When I get some more games maybe I'll do a video on it.
Moving right along, I have another big box and this one is from an anonymous sender.
Ahh look at that, it's like a smooth sea of packing peanuts.
Well, it looks like we have a box in a box.
Well, now that that's out, I suppose I better check really good that there isn't anything
hiding in the bottom.
There wasn't, so let's open box #2.
All right!
Looks like Timex Sinclair stuff.
So yeah, this is the Sinclair 2068, which is sort of like an American version of the
Slinclair Spectrum, although it is not totally compatible.
Looks like a little cartridge ROM slot here.
And there's just really basic ports on the back.
OK thank you anonymous.
You'll be seeing this again in the future.
OK, here's the next box.
This one is from Don Jordan.
We're getting close to the end here.
Look at that.
It's a blueberry clamshell.
So, when I said I didn't have one of these, I got like 10 offers for one immediately.
However, upon asking for photos I found that all of them being offered were actually indigo
models.
So I turned them down.
However, I could tell this was a real blueberry.
So I should have all of the clamshell colors now.
I hope to do an updated video on this line of computers sometime this year.
This one is in pretty good shape, except that it is missing the leaf on the apple logo,
which is not all that uncommon.
Hopefully I can find a replacement for that.
Anyway, thank you Don!
One more box here.
This one is from Kazuo Kuroi.
I've no idea how to pronounce that.
Here's a note.
Oh look, the name is pronounced Kazuo Kuroi.
And it looks like he's sent me another Timex.
So, I'm not sure how this happened.
In fact this whole month seems to be a Timex month.
I think I had two people offering me the same thing and I didn't realize they were two
different people.
I get a hundred emails a day so it is hard to remember specific names.
Oh well, at least this one comes in the original box.
Well.
Let's at least take it out of the box and have a look.
Interesting that the foam says Timex Sinclair 2000.
But this is clearly a 2068.
Looks like it came with some kind of tutorial cassette.
And a manual.
Cool.
Well, thank you Kazuo!OK, two more boxes snuck in at the last minute while filming this.
This one is from Serge, the same guy who designed and produced those little Ad-lib cards I showed
in a previous episode.
Not sure what he's sending me here.
OK, apparently it's some kind of 3D printed case for the OPL2LPT card.
Let me grab mine right quick and we'll see how this fits.
Well, that's pretty nice.
Just have to screw it together now.
By the way I do have these back in stock.
Not the case, but the kit.
And for the last box, this is from Brandon Mills.
All right, let's see if we can end the month with a bang.
Haha.
Oh..
Cool.
Yeah, I remember this offer.
VIC-20 paddles.
I have actually always used Atari paddles on my VIC-20 and C64.
So this is cool to finally have some official Commodore Paddles.
Neat.
I don't think that many games used these, but still, very neat to have!
Thank you Brandon!
All right, so that about wraps it up.
I did want to take a moment to thank everyone for all of the generous donations that were
sent, and as well as all of the people who offered stuff to me and I was unable to accept
it, most likely due to lack of space.
So, anyway, hopefully we'll have some good stuff next month too, so stick around and
thanks for watching!
-------------------------------------------
Arkon - Board Game Spotlight - Duration: 6:17. For more infomation >> Arkon - Board Game Spotlight - Duration: 6:17.
 -------------------------------------------
God i norsk - kap 13 - Si sitt sine (hans hennes deres) - Duration: 2:33. For more infomation >> God i norsk - kap 13 - Si sitt sine (hans hennes deres) - Duration: 2:33.
 -------------------------------------------
-Error | Yuma (VY2) Ft. Kagamine Len [Vocaloid Live Action] - Duration: 3:57. For more infomation >> -Error | Yuma (VY2) Ft. Kagamine Len [Vocaloid Live Action] - Duration: 3:57.
 -------------------------------------------
Taco Bell Nacho Fries Review - Duration: 2:48.
Hi, Gizzard Gary here, and I am in beautiful Olathe, Kansas, where I am
going to take the Taco Bell challenge. That's right, this is the challenge that
NeverEnuffAmmo has given to all the GunChannels members to try the Nacho Fries
from Taco Bell, so I have my cheese dip here, and I have the fries, so we're gonna
try this. First, we're gonna try just a fry without the cheese sauce, see how
this is.
I like it. It's crispy, it's got just a touch of the
nacho seasoning on it, it's a good french fry.
And so, now we're going to try a french fried dipped in the cheese sauce to see
if it is indeed the Nirvana that NeverEnuffAmmo says it is.
That is very good. Sorry RowCall, I know you're not gonna like my assessment of
this, but now they gave me quite a bit of cheese sauce on mine, and I think it's
very good. So now we're gonna try these nachos fries supreme. These nice people
didn't give me any kind of a fork or anything to eat these with, so I guess
I'm gonna eat these caveman style, so see if I can get a hold of one.
Quite tasty, although I'm gonna go back through the drive-thru and make them give me,
give me a spork or something eat these with, because there's no way I can do
this. But anyway, I'm gonna go ahead and give it a thumbs up, and thanks for watching.
Hi, this is Gizzard, thanks for watching. If you like this video, be sure and click
that Like button, also share, and if you want to see more videos like this please
click the Subscribe button. Also, if you'd like to support this channel, please
support me on Patreon.com. That address is patreon.com/GizzardGary.
Thank you!
-------------------------------------------
CBC NL Here & Now Thursday February 1, 2018 - Duration: 1:02:30. For more infomation >> CBC NL Here & Now Thursday February 1, 2018 - Duration: 1:02:30.
 -------------------------------------------
Le Havre, France -- Princess Cruises Local Connections - Duration: 3:04.
♪fun, upbeat music plays ♪
Female VO: Welcome to La Havre, France, the gateway to the
historic landing beaches, the Norman countryside and romantic
Paris, the city of love.
To be French, is so powerful, I am so proud of our culture and
of our history.
Paris, the most romantic city in the world, as we say, I
think it is true.
Paris, of course, is a very modern city but in the middle
of that, the Eiffel Tower: majestic, incredible. It has
become one of the major recognized sites in the world.
You can also grasp the feeling of this wonderful city on a
Seine river cruise before heading to have lunch on the
first floor of the Eiffel Tower That's another alternative and
a quite a good one as well, I can tell you.
Take a trip to the Louvre and say 'hi' to Mona Lisa and you
will also take time to have a look at the beautiful
architecture. The Louvre is absolutely magnificent.
I won't go to Paris without seeing Notre Dame. When you
walk inside Notre Dame, you find peace.
I think my favorite part is Montmartre. Walking along the
old Parisian streets where you find perfect bakeries,
crispy baguettes, and croissants; it's incredible.
You have to experience it.
People are overwhelmed, they've read so much about it in films
but being physically there where all this happened; each
time I go there, I am filled with the same emotions.
You have a nice cheese platter with a glass of wine, along the
Vieux-Bassin, the 'Old Harbor' where the atmosphere is so
totally different, you are in another world so you will
love Honfleur.
We are extremely into the arts - this has always been part of
our culture. Impressionism, Monet has done that beautifully
painting his gardens in Giverny for example, and the feeling
you get when you wander inside his gardens makes a great,
an incredible atmosphere.
Monet did paint Rouen Cathedral as well. Rouen is famous for
its ancient historical city center.
I think what inspires me the most is the ever-changing
cruise industry. There's not one day that looks like the
other. That's so exciting, that's so exciting. I love
my job.
Female VO: "Michaël and your local connections team are here
to help you discover all that this incredible region has
to offer.
We are, as you know, very proud of our country, very
proud of our culture, and no one, no one ever will take that
away from us.
-------------------------------------------
God i norsk - Kap 3 - Modalverb - Duration: 1:39. For more infomation >> God i norsk - Kap 3 - Modalverb - Duration: 1:39.
 -------------------------------------------
Minikloon Crashed A Hypixel Skywars Lobby! – Hypixel Admin Abuse! - Duration: 1:06.
♫ Music ♫
-------------------------------------------
El temido Gatillazo - ¿Qué hacer si te pasa? - Duration: 3:55. For more infomation >> El temido Gatillazo - ¿Qué hacer si te pasa? - Duration: 3:55.
 -------------------------------------------
Crochet Cow Tutorial - Duration: 58:44.
Welcome everyone, thank you for joining me. I'm Kerri.
Today I'll be showing you how to crochet this cow.
Now for the same color cow as I've done you'll need pink, black, gray, and white
cotton or wool. I use four ply crochet cotton but you use whatever you prefer. A
crochet hook, I use a 1.25 millimetre, but use whatever you like
to use with the ply you're using. I've got my sewing thread to stitch it
together and the needle. I've got a darning needle to weave in my ends and
I've got my scissors. I'm going to start with my head. Using white I make a magic
loop and work three chain and fourteen double crochet into my circle.
I pull the circle tight and slip stitch in the third chain. For row two I
start with three chain and work one double crochet in the same place as the
chain, and then I work two double crochet into each stitch around. So I'll work
around row two working two double crochet into each stitch, and I'll meet
you at the end. At the end of the row I join with a slip stitch in the third
chain. For row three I start with one chain and work one
single crochet in the same place as the chain, and then I work one single crochet
into each stitch around.
So I'll work around with my one single crochet into each stitch and I'll be
back. At the end of the row we join with a slip stitch in the chain. And that's
the head done, we don't fasten off. I pull that out a bit, the loop, just so it
doesn't unravel and I'm going to start with the inner ear there the pink part. I
join it into the next stitch
and I work three chain, and a two double crochet cluster into the same place as
the chain,
and fasten off. Now I work the second ear twelve stitches on from the first. I
join my pink cotton and work three chain and a two double crochet cluster, and fasten
off.
And that's the inner ears done. I'll just weave in my ends because I find it easier
before I crochet around the edge. Now for around the ears, using the cotton
for my head I work one single crochet into each stitch around the first ear,
and then I slip stitch into the head,
and fasten off.
For the second ear I join my white thread the stitch before the ear, and I
work one single crochet into each stitch.
So I'll do that and I'll weave in my ends and I'll be back and we'll do the
horns. For the right horn we join two stitches after the right ear and we work
six chain. We work a slip stitch into the second chain from the hook, a single
crochet into the next stitch. Now we work a joined half double crochet over the
next two stitches,
and then a half double crochet into the last stitch, and slip stitch into the
head, and fasten off.
For the left horn we start three stitches back from the left ear, and work
five chain.
We work a slip stitch in the second chain from the hook, a single crochet in
the next stitch, and then two half double crochet into each of the next two
stitches,
and slip stitch into the head, and fasten off,
and that's the head done. For the muzzle I'm using my pink. I start with a magic
loop, and I work three chain and two double crochet into my circle. Next I
work one half double crochet, and then
three double crochet,
and now nine half double crochet.
I pull the circle tight and slip stitch in the third chain. For row two I start
with four chain, and work one treble in the same place as the chain, and now I work
two double crochet into each of the next two stitches.
Now one half double crochet in the next stitch. Now two double crochet into each
of the next two stitches.
Next we work two treble into each of the next three stitches,
one double crochet and one half double crochet into the next stitch, and now one
half double crochet into each of the next three stitches,
one half double crochet and one double crochet in the next stitch, and lastly
two treble into each of the remaining stitches,
and join with a slip stitch in the fourth chain, and fasten off.
I'll pull the circle tighter if I can, my fingers aren't working very well today,
and that's the muzzle done. That where it goes down a little bit that's the top
part. I'll start on the outer eyes now., Using my white I make a magic loop and
work one chain and six single crochet into my circle.
I pull the circle tight, and slip stitch into the chain, and fasten off. I'll need
two of those. For the inner eye, using my black, I make a magic loop, and work one
chain and two single crochet into the circle. I pull the circle tight, and slip
stitch into the chain,
and fasten off,
and I've got a tiny little circle. I'll need two of those. I'll start on the body
now. I'm starting on the little part behind the head. I start with eight chain,
I miss the first chain and I work one single crochet into each stitch to the
end.
Rows two and three are worked the same. I start with one chain, and turn, and work
one single crochet into each stitch.
And row three is the same.
For row four we start with one chain, and turn, and work two single crochet in the
first stitch, and then one single crochet into each stitch across.
Now we work fourteen chain. We're starting for the back of the cow.
We miss the first chain and we work two single crochet in the following chain.
Now we work one single crochet over each of the remaining chain, and also
along the back there.
For row six we start with one chain, and work two single crochet in the first
stitch. Work one single crochet into each stitch to the last stitch, and we work two
single crochet into the last stitch. So I'll work this row and I'll be back. Now
I've completed the two single crochet in the last stitch. For row seven we work
one chain and turn, and we work two single crochet in the first stitch, and
one single crochet into each stitch to the end.
For row eight we work one chain and turn, and we work one single crochet into each
stitch to the end.
For row nine we work one chain and turn, and we work two single crochet into the
first stitch, and we work one single crochet into each stitch to the end.
For row ten we work one chain, and turn, and we work one joined single crochet over
the first two stitches, and then we work one single crochet into each stitch to
the end.
For row eleven we work one chain and turn, and we work one single crochet in
each stitch to the end. So I'll work this row and I'll be back. For row twelve we work
one chain and turn, and we work a joined single crochet over the first two
stitches, and we work one single crochet into each stitch to the last two
stitches, and we'll work a joined single crochet over the last two stitches,
and I work my joined single crochet over the last two stitches. For row thirteen I
start with one chain and turn, and I work one single crochet into each stitch
across.
For row fourteen I work one chain and turn, and I work a joined single crochet over the
first two stitches, one single crochet into each stitch until I get to the last
two, and I work a joined single crochet over the last two stitches.
Now I work my joined single crochet over the last two. For row fifteen I work
one chain and turn, and I work one single crochet into each stitch across.
For row sixteen we start with one chain and turn, and we work a joined single
crochet over the first two stitches, one single crochet into each stitch until
the last two stitches, and then we work a joined single crochet over the last two
stitches,
and it's bending in nicely there for the shaping. For row seventeen we're starting with
the back leg here. We start with one chain, and turn, and we work a joined
single crochet over the first two stitches, and then we work one single
crochet into each of the next three stitches. For row eighteen we work one chain
and we turn, and we work a joined single crochet over the first two stitches, and
then we work one single crochet into the remaining two stitches. Rows nineteen to twenty-two
will be worked the same. We start with one chain and turn, and then we work one
single crochet into each of the three stitches.
The last one doesn't look right.
So three more rows, one single crochet into each.
For row twenty-three we work one chain and turn, and we work one single crochet in each
of the first two stitches, and two single crochet in the next stitch. For row
twenty-four we work one chain and turn, and we work two single crochet into the
first stitch, and then one single crochet into each of the remaining stitches, and
we fasten off.
For the front leg, we join five stitches from the front,
so in there. You start with one chain and work one single crochet into each of
the first three stitches, and then a joined single crochet over the last two
stitches. For row two we start with one chain and turn, and we work one single
crochet into the first two stitches, and a joined single crochet over the following
two stitches. Rows three to six are worked the same, one chain and turn, and one
single crochet into each of our three stitches.
Row seven we start with one chain and turn and we work one single crochet into
each of the first two stitches, and two single crochet into the next stitch. Row
eight we start with one chain and turn, and we work two single crochet into the
first stitch, and one single crochet into each of the remaining stitches.
Now that's the cow body done. We're going to do a neatening row, but I'll just weave
in my ends just to make it easier for me to show you how to do the neatening row.
Using my cotton from the leg I start with one chain and I'm going to work one
single crochet into each stitch down the leg.
We work one single crochet into the first stitch under the body. Into the
next stitch we work one half double crochet, one double crochet, and then one
half double crochet. That just gives it a little bit of shaping under the body and
then we continue working a single crochet into each stitch around the rest
of the, under the body, and right around the leg and right up just to about here,
the last stitch before the top of the body, for where we start the tail. So I'll
continue around to the tail and I'll be back. Now I've neatened around to the tail.
For the tail I start with thirteen chain.
I miss the first chain and I work one single crochet into each of the next two
chain. I work a joined single crochet over the next two chain, a single crochet in
the next chain,
a joined single crochet over the following two chain, a single crochet in
the next chain, two single crochet into each of the next two chain,
and then single crochet into each of the remaining chain,
and then single crochet into the body.
Now on the top of the body we work one single crochet into the first stitch, and
then we're going to do a little bit of shaping. Into each of the next two
stitches work one half double crochet, and then one double crochet into each of
the next two stitches,
one half double crochet into the following two stitches,
and then continue around the body working one single crochet into each
stitch, right round to where we started. So I'll finish this row and I'll join
with a slip stitch in the chain and I'll be back and we'll put the end on the
tail. Then we've got to do the black markings and do the udder. And there's
the cow's body done. For the tail, with my black, I join on the wrong side just in
the end of the tail, and I work one chain, and three single crochet into the same
place as the chain.
For row two I work three chain and turn, and I work a double crochet cluster over
each stitch, the three stitches, and fasten off,
and that's the tail and body done. For the large marking I start with ten chain.
I miss the first two chain and I work a half double crochet into each stitch
to the end.
For row two I start with one chain and I turn, and I work a single crochet into each of
the first two stitches, I slip stitch into the next stitch and work three
chain, and I work a double crochet, and a treble in the same place as the chain. I
work a treble and a double crochet into the next stitch, work three chain, and
slip stitch in that same stitch, and then I work a single crochet into each stitch
across.
For row three I work one chain and then I work a single crochet into each stitch around
just to do a neatening row.
So I'll continue around just working a single crochet into each stitch and then
I'll be back. And there's the large marking. For the tail marking I start with nine
chain.
I work one double crochet in the fourth chain from the hook, one double crochet
into the next stitch,
and one treble into each stitch to the end.
Then I work three chain, and slip stitch into the same place as the last
treble,
and fasten off,
and that's for there. For this small marking I start with seven chain.
I work one double crochet in the fourth chain from the hook, one double crochet
into the next chain, and one half double crochet into the remaining chain,
and fasten off,
and that's the small marking. For this front marking I start with nine chain.
I work one half double crochet in the third chain from the hook, one half
double crochet into the next stitch,
one double crochet into the following stitch, and then a treble cluster over
the remaining stitches,
and fasten off.
For the udder I start with a magic loop,
and two chain, and work ten half double crochet into my circle.
I pull my circle tight, but I don't join. For row two I start with one chain
and turn and I work one single crochet into the first four stitches. Then I work
two chain and slip stitch into the single crochet. Then I work a single crochet in
the same place, and then a single crochet into each of the next two stitches. Work
two chain and slip stitch into the single crochet. Work a single crochet into the
same place as the last single crochet and then one single crochet into
each of the remaining stitches, and fasten off.
Now I'll weave in my ends and I'll make another set of eyes and then I'll be
back to put it together. Now there's all my pieces. The first thing I'll do is
stitch the markings onto the muzzle, and the inner eyes onto the outer eyes, just
like that, and I'll also stitch the udder onto the
body, just in there. Now I'll stitch the muzzle onto the head just under the
centre circle, and then I'll stitch the eyes on just above the muzzle and I'll
do the markings around it. I'll do eyelashes and I'll do a row of black
around the eyes, just to make it stand out more. Now the heads done. If I was
making a black cow or a brown cow I wouldn't need the markings around the
eyes. I'll attach the head to the body, it just goes on just like that. Now the last
thing I do is position the markings onto the cow. The large one goes there, the
small one just behind the head, this one's for the front, and this one just
fits in round the tail. So I'll stitch those on and I'll also give it a quick
iron so that the tail sticks down and I'll be back to show you the finished
cow. And there's the finish cow. I have my patterns on my website, the details are
in the description below, so if you're not sure of anything you could check
there and I'll also try to have a picture of a black cow and a brown cow
up on my pattern. If you liked my video please like, subscribe, and share. Thank
you for watching. See you next time. Bye.
-------------------------------------------
Former FBI Asst. Director Thinks That Hillary Should be Shot by Firing Squad! - Duration: 1:52.
Former FBI Asst.
Director Thinks That Hillary Should be Shot by Firing Squad!
Former Ass Dir James Kallstrom knows Hillary and the one thing she did to be brought before
a firing squad.
Former FBI Assistant Director James Kallstrom is not playing around, and he knows harsh
truths about Hillary Clinton and the one thing she did that warrants being shot by a firing
squad.
It's one thing to commit white collar crimes, but Kallstrom is pointing out something that
many Americans may not realize, which is the one thing Hillary did that warrants death
by firing squad.
It is the fact that Hillary put her private unsecured server in her basement at her residence
and mishandled classified docs, this is the reason she should face a firing squad in James
K's Opinion.
What is he talking about?
When Hillary put in a home-based, private server and intentionally used it, emailing
out nation's most classified documents, this was a crime warranting treason.
Democrats will scoff at this, calling it ridiculous, but is it?
James K. also says he thinks that the only reason she wanted to keep off the govt servers
is to hide her illegal activity.
The only reason the server was discovered was a Benghazi FOIA that led to the discovery
of the server in HRC basement.
We know Hillary intended to keep off the "state dot gov" servers for one reason, and that
was because she said she didn't want her illegal activities subject to a Freedom of
Information Act (FOIA) requests.
It should be noted that it was exactly FOIA requests into Benghazi by Judicial Watch that
led to the discovery of her private server.
What do you think about this?
Please share this news and scroll down to Comment below and don't forget to subscribe
Top Stories Today.
-------------------------------------------
Setting up and using the new Audiences report in Google Analytics - Duration: 4:26.
Hey there!
I'm Benjamin from Loves Data and in this video we're going to look at the new Audiences report
in Google Analytics.
The Audiences report works in combination with the remarketing lists you've created
inside Google Analytics.
And the report allows you to see details for the users that are included in each of your
remarketing lists.
Now I know that you might not be running remarketing campaigns or even advertising with Google
AdWords and that's totally okay.
You can make use of the Audiences report even if you're not advertising with AdWords.
So let's take a look at the report and the steps we'll need to take to get them setup...
Lets get started!
// The Audiences report allows you to see details about the different audience lists
you've created in Google Analytics.
For example, you might have created a list for people who have viewed a particular page
(or series of pages) on your website, but haven't converted.
You can then see behavior, engagement and conversion metrics for users that are included
in the audience.
And once you've enabled the reports you can even use the 'Audience' dimension when creating
custom segments and custom reports.
The Audiences report is designed for people running remarketing campaigns in Google AdWords,
but you can still use the report even if your not currently advertising.
To do this you will still need to create an AdWords account, but you don't need to have
any campaigns running or any budget in the account.
It's simply required to enable this (and other reports) in Google Analytics.
So the first thing you'll need to do is create an AdWords account, if you don't have one
already, and then you'll need to link AdWords with Google Analytics.
If you need help completing these steps, then check out my extra resources in the description
below this video.
Once you're accounts are linked, you'll then need to head to the admin section of Google
Analytics and enable remarketing.
To do this, select 'Audience Definitions' under the 'Property' column and then select
'Audiences'.
In this example we can see that there are currently no remarketing lists, so we need
to create our first list.
This will also enable remarketing for our property.
Let's click 'Next Step'...
Now we can choose where we want to use this audience.
Let's click 'Add Destinations'...
We can now see we have the option to use this list in Google AdWords for remarketing, but
that we also have the option to use this list in Google Analytics.
By selecting our Google Analytics property, this means the list will begin to collect
data into the Audiences report.
Let's select our property and enable the list.
Now, moving forward, you'll begin to see data showing up in the Audiences report.
And just to highlight, you can choose to make the list available in Google AdWords and Google
Analytics at the same time, or you can just make the list available in Google Analytics.
It's completely flexible.
Now let's take a look at what we'll find in the report...
If you've only enabled one list, then you'll only see the single list in your report.
If you've enabled multiple lists to be used with Google Analytics, then they'll all begin
to collect data into the report.
You can then see the acquisition, behavior and conversion metrics for each of your lists.
And as I mentioned, you can also use the Audience dimension when creating segments and custom
reports.
For example, you can click on 'Add Segment', then create a new segment...
You can then select 'Conditions'...
And find the 'Audience' dimension under 'Users'...
This then allows you to add the name of an audience list, to then only view trends and
data for users included in your list.
This allows you to perform more detailed analysis of how these people engage on your website.
// So the new Audiences reports allow you to collect data for the different audience
lists you've configured inside Google Analytics.
They are designed to help you understand how users in your lists engage with your website
and although they are designed for people running remarketing campaigns in Google AdWords,
remember that you don't actually need to have any active campaigns in order to begin using
the report.
Just remember you'll need to add your Google Analytics property as an 'Audience Destination'
in each of the lists you'd like to see included in the report.
Are you using the new Audiences report?
I'd love to know!
If you have any tips, please share them in the comments below.
And if you found this video helpful, then please like it, so I know to make more videos
like this.
See you next time!
-------------------------------------------
Kristin Omdahl's Quick Tip: What is Yarn Weight? - Duration: 3:15.
Hi I am Kristin Omdahl and welcome back to my studio!
Today I want to talk to you about yarn weights.
Something I get asked a lot of questions about is why one ball of yarn can have a different
amount of yards (or meters) than a different ball of yarn yet be the same weight.
And I thought the best way to explain it to you was to use a product you are very familiar with.
I was at the grocery store this morning and saw two boxes of spaghetti pasta and I thought
AHA this will really help to explain.
Both of these boxes are one pound (454 gm) of pasta.
You can make one pound (454 gm) of pasta for your family but a fettuccine noodle is much
thicker than an angel hair noodle so you will have more pieces of them.
When you look at the actual pieces side by side, you will see one is so much thicker
than the other.
But yet, each box has the same weight.
If you look inside the boxes, you will see there are far more pieces of angel hair than
there are of the fettuccine.
See how many more pieces of the angel hair there are than pieces of the fettuccine?
Again, the boxes are the same weight and you have the same quantity by volume of food,
but because of the thickness of the pasta, you will have a different amount of pieces
of pasta.
And now let us compare that to yarn.
So here we have a worsted weight yarn that is 4 ounces (113gm) and another worsted weight
yarn that is 4 ounces (113gm) and notice they are even different thicknesses.
This is a yarn that is loosely plied and this is a yarn that is more tightly plied.
We also have another worsted weight yarn and you can see all three of those - even within
the worsted weight - we still have a different texture but all on the thicker side.
Now let us compare to a finer yarn.This is 4 ounces (113gm) and 247 yards (225m) and
this is 4 ounces also (113gm) and 650 yards (597m) of yarn.
This one would be the fettuccine and this one would be the angel hair.
And notice that they are both the same weight but this one is much less yardage because
the yarn is thicker.
And that is what I wanted to explain to you.
I'll post a link in the video description to a blog post I wrote all about this subject,
including a really wonderful chart from the Yarn Council that talks all about yarn weight
standards.
You will see the number system, as well as the name system that is given to yarns.
And this information is available on all your yarn labels as well.
Follow the link and you'll get to see how to compare all of these by the yarn label.
I hope this helps you understand yarn weights.
If you have any other questions about yarn weights, please leave them for me in the comments.
I'm happy to help in any way that I can.
Please subscribe to my channel for more videos.
-------------------------------------------
Mission: Impossible 6 - Fallout (2018) Türkçe Altyazılı Resmi Fragman Duyurusu - Duration: 0:08. For more infomation >> Mission: Impossible 6 - Fallout (2018) Türkçe Altyazılı Resmi Fragman Duyurusu - Duration: 0:08.
 -------------------------------------------
Making a Vsauce3 Video - Duration: 9:03.
Hey your script!
Thank you sir, don't know if we will need it because we are actually going to use prompter
for this since it is on sticks but thank you still.
Hannah do you think that you could move that keylight back by a foot.
Yup, that is perfect thank you Hannah.
Ok, let's roll on camera.
Vsauce, I'm Jake and how do you make a Vsauce3 video?
Well, you first need a question.
For me, that usually comes from a video game, book, or movie.
In the case of my last video "Could You Be a Parasite?" it came from one of my favorite
movies, The Thing.
If you haven't seen that episode I would highly recommend watching it, there'll be
a link in the description, because that is the episode we will be focusing on today.
In order to create I need a problem to solve, what is it that I'm trying to answer and
how can I answer it in a way that is unique to me, is different?
But that doesn't mean the "idea" needs to be wholly original, I mean, everything
is an interpretation or retelling of something that has come before, consciously or not.
It's the presentation and, in the case of a Vsauce3 video, it's the way the story
is presented in particular, the journey you go on to find answers or uncover new questions.
You need to find that topic that burrows into your mind, nagging you to find out more, to
answer it.
(walks off frame into real world)
This video has one purpose to show you what goes into making a Vsauce video.
On Twitter I asked if you'd be interested in a video about actually making a video,
a kind of behind the scenes look, and a resounding amount of you said yes.
And I've already discussed the process of not making a video in my video about not making
a video, the weeks or months that go into reading and researching and the days that
go into condensing the information into a narrative script so we will pick up there.
Once we have the script...what happens?
Well, for me, I need music.
When that beat kicks in it motivates everything.
It sets the tone to let you know how to feel, it can enhance your expectations, and then
you use the camera and the script to emphasize that.
This frame is a canvas.
Everything in it: my voice, my movements, the camera's, the music, the script all
exist in this tiny rectangular world.
Nothing outside of it matters, forget about it and focus on what I show you, what I tell
you.
I write with music in mind so that the script and soundtrack feel like they were made to
be together.
I always create a playlist before I film anything...I've already made the movie in my head.
Now that you have your music and your script, the fun begins.
You decide how you use the camera to capture the narrative you want to tell.
For example, Jake says, "It's transient.
To continue it's life cycle it has to find
a new home."
The camera pans to reveal the house.
The Music comes up.
Jake walks into frame and towards the cabin.
We hear his voice from the next shot.
But then there are parasites that are more insidious.
Now everything is captured.
We have all of these individual pieces that need to be put together.
Side note: When I write, I've already found all the assets I want to include: archival
footage, stock footage, etc.
It isn't an afterthought, everything you show on screen has to have purpose.
Again, it has to be motivated.
See, this clip has no reason to be here...it detracts from the story.
Then comes my favorite part.
The lie.
Where, if we did our job well, you don't even notice that we were lying to you.
And for that we need the best liar on the planet, our cinematographer and VFX wizard,
Eric Langlay.
If you're interested in learning how to do those kind of visual effects, rotoscoping
and masking, there are lots of tutorials online but one of my favorites is VFX Rotoscoping
101 on Skillshare.com who we use a bunch and were nice enough to sponsor this episode and
support Vsauce.
If you want to try it out, we have a deal for 3 months for only $.99 that you can go
to with the link in the description.
I actually used their color grading course a few months ago which brings us to the next
part of making the video.
The way it looks.
This is how the camera captured it.
It looks like a really flat image, not much color, saturation, shadows, highlights or
contrast but that's because we use a camera, a RED, that records RAW images.
Your cellphone for example applies a color profile and such when you film which makes
it harder to adjust after whereas this camera captures a lot more information, metadata,
and then allows you to adjust all of those factors later.
So we can go from this to this with color correction and with much greater latitude.
And even how you color grade the footage is important - it allows you to set a visual
tone.
I purposefully oversaturated most of the footage and removed highlights and increased shadows
because I thought it was an interesting juxtaposition next to the dark and creepy subject matter.
It is important to use every tool available to you to create exactly what you want.
Every piece matters.
They all need to work together, to balance out, for me there should be a thoughtfulness
with what you make.
From the script, or the information given, or the cinematography, music, visual effects,
color, even the sound.
Sound design is successful when you don't notice it.
Let's use the intro shot as an example.
This is what it sounded like when we filmed it.
There's no sound because the drone we used doesn't record sound.
So we have to recreate it entirely.
Here is the same shot but with sound effects: the wind, trees swaying, footsteps in snow
matched up to me walking, and a nice sound effect for emphasis on the title.
Now here it is again with my voice dubbed over to sound like I'm talking through a
radio.
That was actually recorded a week later in my apartment on my cell phone.
And finally, here it is with the soundtrack.
One thing I've been really into exploring is match cuts, when the sound of one thing
is replaced by another.
Like when I slam the door in this scene but instead of hearing the door close, you hear
wood bursting from flame.
It's about playing with expectations.
Oh, also the fire crackling is from a campfire months early recorded in Alaska.
Here it is without the fire sound effect.
And all those adjustments we make are defined before we film.
It has to be exact to create the illusion of the world we are trying to present.
It doesn't matter what story you tell as long as you can tell it well.
And believe me, the hardest part of making a video is actually making it.
Not to get too meta but even this video took me awhile to make because I wanted it to have
purpose but maybe, sometimes, sharing is purpose enough.
And, as always, thanks for watching.
Last thing, we like to custom make the Vsauce outros to fit the topic of the video.
So for COuld You Be a Parasite, Eric 3D printed a Vsauce plate, put it on the back of a fish
tank, filled the fish tank with smoke, filmed through the fishtanks and smoke to the plate
and then lit a trash bag on fire to get this practical effect.
love u
-------------------------------------------
QUEM É MAIS BARRAQUEIRO? QUEM FALA INGLÊS MELHOR? Vídeo em INGLÊS com legendas - Duration: 13:48. For more infomation >> QUEM É MAIS BARRAQUEIRO? QUEM FALA INGLÊS MELHOR? Vídeo em INGLÊS com legendas - Duration: 13:48.
 -------------------------------------------
Ant-Man and the Wasp trailer EXCEPT ᵒᶰᶫʸ ʷʰᵉᶰ ᵗʰᵉʸ'ʳᵉ ˢᵐᵃᶫᶫ - Duration: 0:27.
a n t
Không có nhận xét nào:
Đăng nhận xét