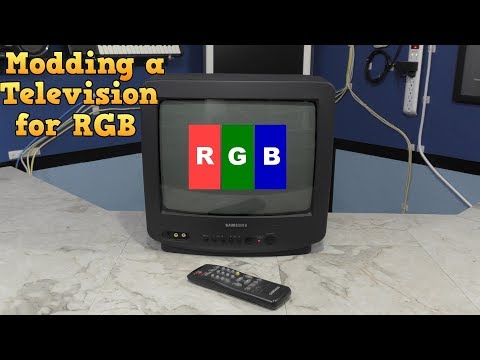
Hello and welcome back to the 8-Bit Guy.
So, I'm sure you guys have seen this little TV in a lot of my episodes.
I've been using it for years, and I've actually had this in my possession since 1997.
I have a little story to tell you about that.
I was actually working at AST computer.
I worked in the tech support department and I actually have a lot of stories about that.
And I actually hope to compile some of those little anecdotes for a video at some point.
But, one of the things that actually happened around 1997 is that AST was having some financial
problems and they were actually being bought out by Samsung.
And, one of the things Samsung wanted to do to help enlist the trust of all their newly
acquired employees was to give them all a gift.
And, we had the option of receiving either a little TV like this one, or a VCR, or a
microwave oven.
I actually opted for the TV.
And it's actually been a really fantastic little TV.
Now, I want to point out that when I first received this, it was 1997 and I was 22 years
old, and I was living in a 1 bedroom apartment with my newly married bride.
Well, at the time we didn't have a lot of money and this actually became our bedroom
TV and we actually watched TV on this.
This is, this little 13 inch TV, it's hard to imagine, this is actually what we watched
TV on every evening for probably a couple of years.
So, for the last 15 years or so, this has become essentially just a monitor for me.
I don't really use the TV part of it anymore.
In fact, I couldn't even if I wanted to because analog TV doesn't exist anymore.
But, it makes a really good little composite monitor for hooking up to a Commodore, Nintendo,
or Atari, or something like that.
But, it has been brought to my attention, repeatedly, over the last several months,
that it is actually possible to mod consumer televisions like this to display an RGB signal.
Specifically, an analog RGB signal.
Now, why would I want to do that?
Most every computer made since the late 1980s has either supported some sort of RGB video
signal, or just flat out required an RGB monitor.
However, there are a variety of different standards.
So the Amiga, for example, used this 23-pin connector.
The Apple IIgs used this 15-pin connector.
IBM CGA and Tandy machines used a 9-pin connector.
And of course, VGA is also a type of RGB signal as well.
An RGB signal typically consists of 3 separate wires carrying the red, green, and blue signal.
There is also typically a sync signal and a ground.
Of course, any Color CRT television has to break the signal into RGB at some point because
that is how it is delivered to the back of the cathode ray tube.
However, that is a high voltage signal at the back, so ideally you'd want to feed
the RGB signal somewhere on the low-voltage part of the board.
Let's take this one apart and see what we can find.
OK, this is all pretty standard stuff for a TV from this era.
First thing I'll want to do is discharge the tube.
This spring appears to be connected to DAG ground, so I'll attach my alligator clip
to that.
I'll attach the other end to a screwdriver.
And I'm not really expecting anything since this has been powered off for days and most
TVs from this time have a discharge resistor.
And yep, there's nothing.
I'll go ahead and remove the suction cup.
And now I just need to start unplugging things.
I'll start with the tube itself.
And eventually, the board will come out.
This thing is a bit dusty.
I'll go ahead and hit it with some compressed air.
OK, so looking at this board, there are only two chips we need to focus on.
One is this micro controller.
This chip drives the on-screen display, tunes channels, listens to the remote control, etc.
This other chip here is what is commonly referred to as a jungle chip.
Almost every TV from this time period has one.
This chip does most of the signal processing.
One of the things the Jungle IC does is it takes in the composite video signal, and then
decodes that into RGB and outputs it to the high voltage part of the TV.
However, it also accepts a direct RGB signal from the micro controller for the onscreen
display.
But in order to know when to switch to that, there is another line called the blanking
signal, which the micro controller will output when it wants to use the screen.
So, what we need to do is tap into this RGB signal here and take that to the back of the
TV.
And then we need to locate 5V somewhere on the board and run that to a switch at the
back of the TV that we can use to force the blanking signal whenever we want, so that
the RGB signal will override everything.
There's still one piece of the puzzle left.
You still need to get sync from somewhere, well, we can use the regular composite input
for that, because the jungle chip is designed to overlay the RGB on top of an existing signal,
so it will still be looking for the sync signal from the composite input.
OK, so that's the rough explanation of how this works.
Now, I'm not going to go into great details about resistor values and stuff like that
because every single TV is going to be a little bit different.
In fact, analog electronics is not exactly my strong suit.
I actually got a lot of help from a guy named Mark Cowan who looked up the schematic diagram
for my particular TV model and he actually helped me figure out which resistor values
I needed for mine.
Now, let's get to modding.
One of the first things I'm going to do is place a jumper wire across this resistor.
I'll be honest in that I don't fully understand why I'm doing this, but I was told it would
improve the picture quality.
This has something to do with the closed-captioning circuit where it dims the background around
the text, and apparently we want to turn that feature off.
And that should do it.
Now, these 3 resistors here are on the red, green, and blue lines and their purpose is
to lower the voltage coming from the micro controller to the correct input voltage for
the jungle chip.
Now, what we need to do, is add in another 3 resistors in series to these, like this,
and then we want to run our external lines in between them, like this.
So, the way I'm going to do that, is I'm going to heat the legs up on one end of these
resistors and pry them out.
Then I'm going to straighten the leads on them.
I'll use some desoldering braid to soak up the solder and open these holes back up.
Then I'm going to take these 3 new resistors and put them in those same holes.
Like this.
And then I'll solder in those resistors from behind.
And so what I've done is connected the resistors together in 3 little triangles and soldered
wires to the top of the triangle.
I'm putting some heat shrink on just to make sure they never touch each other.
And there we go.
There was also this unused connector port on the board, not sure what it was going to
be, but it has a ground available, so my 3 signal grounds are going to connect here.
And there's also a 5V signal in this same unused port, so I'll connect to that for
our little blanking switch.
And I'll just solder those in from the back.
And then we need to connect a wire to the blanking pin on the micro controller.
That's where our 5 volts will go when the switch is turned on.
It's pin 25 on this chip, so I'll just put some solder on the leg here, and then
I'll come back and just solder my wire directly to it.
Like so.
Believe it or not, that is all of the modifications that need to be done to the board itself.
So, I'll go ahead and reassemble everything for testing.
Now, I have this really long ribbon cable coming out of the TV.
But, for the moment, I just want to find out if the TV is still working after all that
I did to it.
So, I'll connect up the Apple IIgs from the composite port and hopefully the TV doesn't
blow up or anything.
Well, here goes.
Ok, no smoke or anything, so that's a good sign.
I did notice the onscreen display is a little dimmer than before, and I think that was to
be expected with the mods that were made.
But it is still plenty readable, so that's fine.
Let's power on the Apple IIgs.
And we have a picture, exactly like it should be.
OK, all good so far.
Next, I want to do a quick and dirty hack here to test the RGB.
So, I've taken the ribbon cable and wired it straight to this 15-pin connector.
I've also just tied the blanking wires together.
So, I'll plug this into the back of the Apple IIgs.
And let's fire it up.
To my amazement, it worked first try.
And the signal is amazingly clear.
Although my camera isn't cooperating since the polarization is causing a moire pattern
on camera.
But I'll try to get some better closeups later.
But for the moment, I'll just run through these colors to make sure everything is correct,
and it is.
I will also set it to 80 columns for a quick test.
Typically 80 columns on a television is unreadable.
However, it is very readable here.
Again, I apologize for the moire pattern, but I'll get you some better footage later.
So, what I need to do now is figure out where in here I can mount my connectors.
I want to mount this switch and these 3 RCA jacks.
The trouble is, if you look back here, there's a lot of stuff potentially in the way.
I definitely don't want to have the wires or back of the jacks bumping into these heat
sinks, the flyback, or anything else.
Now, there's actually space on the side of the monitor, but I don't think that would
be particularly elegant.
So, I think I'm going to put them up here.
As always, I'll put down a piece of masking tape to mark my holes.
That way if I mess up, I can just put a new piece of tape on there.
I like all of my stuff to line up nicely, so I'll start with a straight line.
Then I'll mark 4 spots that are 15 millimeters apart.
Then I'll use a tiny drill bit to mark a pilot hole on each one.
After that, I don't need the tape anymore.
Then I'll drill the larger holes.
And as you can see, perfect fit.
OK, so I've mounted the RCA jacks and toggle switch.
Since I was not able to find any colored RCA jacks in time for this video, I'll just
add a little label here for that.
And, this switch of course will enable or disable the RGB input.
Now what's left to do is solder wires to all of these things.
And so skipping forward a bit, I'm just about finished with that.
Now, this is an entirely separate ribbon cable.
And so my plan is to place an IDC connector at the end of this ribbon coming out of the
TV.
The goal is that I want to still be able to remove the back cover of this TV without having
to desolder stuff.
So I need a way to disconnect things.
And so, I thought adding this connector would work well for that.
Unfortunately I ran into a problem on the other side.
I thought I ordered a pack of male and female IDC connectors for ribbon cables.
But the male connectors ended up being for PCB mounting, not for mounting on a ribbon.
And I didn't even notice that until just now.
You see, I was thinking these would be just like the female versions where I could put
the ribbon cable in.
Since it could take several days to get those ordered, I've decided to take a shortcut
for now.
I'm going to plop one of these little guys here on my quad hands.
And then I just soldered all of the wires directly to these pins.
And then, to make sure these don't contact anything inside the TV, I'll coat everything
with hot glue.
Now, I did order the correct replacement part, which I'll have in a few days.
But for now, this should work.
And so, as you can see, I can now take the two halves of the TV and connect them together
like this, before I reassemble everything.
And now, I'm going to need 4 RCA jacks I can connect to my Apple IIgs.
I'm still going to use this little prototyping connector for the moment as it is fast and
easy.
But ideally, at some point I will want to properly build a permanent cable for each
of my systems.
And here's another annoyance.
This cable set was originally advertised as being several feet long, and it's actually
really short.
Originally I planned to cut it in half so I could use it on two systems.
Now it looks like I'll need to just cut these off at the end here.
And so I've now wired these into the video connector.
And on the other side I have red, green, blue, and sync.
So I can go ahead and plug these in here.
And the sync actually goes in the original composite port.
Pity the cable didn't have a yellow plug to match.
OK, lets try this again.
OK, on first try, I got nothing at all.
But then I thought, maybe I mounted the toggle switch upside down.
I've been known to do that.
So, let's flip it the other way.
And try again.
Yep, it works!
OK, so let's try some games.
Wow, this looks really amazing.
I want to show you some comparisons with composite mode.
So I'll flip the switch back to composite and check out the difference.
It's probably more noticeable on a closeup, so we're still in composite, and look how
much clearer it gets when I flip to RGB.
So, let's try another game.
So again, we're in RGB now, and here's composite.
Let's zoom in a bit.
Here's composite.
And now back to RGB.
So, let's try this Tandy Color Computer 3.
It has a funky RGB port on the bottom, so I constructed this little cable for testing.
I could probably make something more elegant later.
So, let's give it a try.
And it works!
So, again let's do some comparisons.
I'll switch it to composite mode and the text is much harder to read.
And back to RGB.
Let's try a game.
Wow.
This looks great.
I've never seen a Tandy Color Computer connected to RGB before, and it looks like a whole different
computer.
It's really amazing.
So here's another comparison, let's switch to composite mode.
And back to RGB.
OK, well, how about this Tandy 1000 It is designed for a digital RGB monitor.
So it does require some slight modification to the signal to convert to analog RGB.
Just to help you visualize the difference, if you looked at an analog RGB signal through
an oscilloscope, it would look something like this.
By varying the voltages, almost an infinite number of colors can be created for any given
pixel.
And that's what we've been working with up to this point.
But what would digital RGB look like?
Well, by its nature, digital is either on or off, a 1 or a zero.
So it would look like this.
However, this setup would only allow a combination of these 8 colors to be produced.
So, what they do in this case is add an extra pin into the mix called the intensity pin.
By using this extra pin, it doubles the number of colors, by creating brighter versions of
each color, thus giving you a total color palette of 16 colors.
And that is how CGA video works.
So you need some extra circuits to convert a signal like this to analog
Fortunately, I have this prototype device here from TexElec which will do just that.
So I'll just plug in my RGB cables.
And let's fire up the Tandy.
And check it out!
It works!
Now, there's some overscan but I'll deal with that in a minute.
Now the Tandy also outputs a composite signal, which you are seeing now, so let's put it
back to RGB mode.
Yeah, the difference is quite remarkable.
So how do we get rid of the overscan.
Well, this TV has a secret service menu that you can access.
The service manual tells you the code to press on the remote, and here it is.
There are a variety of adjustments I can make in here.
And, as you can see, I can move the picture around and make it smaller.
And, so, I'll try Planet X3 in CGA mode.
Looks good!
Next, I'll try it in Tandy mode.
And looks good there too!
Well, the Commodore 128 uses the same type of monitor as the Tandy, when using the 80-column
display, so let's try that.
And there we go.
And it's definitely readable.
So, let's find something with some color.
I mean, I guess I could have booted up GEOS, but it's all black and white anyway.
So this is great, I wish I had known about this years ago.
I wanted to try one more thing before concluding this.
I wanted to try a game console.
I chose the Sega Genesis because it has a standard DIN socket on the back, which was
easy to just poke some of the wires into for a quick test, rather than build an appropriate
adapter.
Now, the thing is, the Genesis has a pretty good composite output already.
But RGB does gain some additional clarity.
For example, look at this yellow text here on this blue background.
Now, when I switch to composite mode you'll see like a black outline that isn't supposed
to be there, and that's an artifact of composite video.
And when I switch back to RGB mode, you can see it is gone.
This is going to be more noticeable in areas of sharp contrast.
For example, looking at the edge of this tree in composite mode you will see that same artifact,
but when I switch to RGB it will be gone.
However, when looking at soft colored graphics like these, there isn't a lot of noticeable
difference.
And although nearly every game console supports RGB video, I don't think you'll get as
much improvement as you will with a computer, mostly because a computer is going to have
a lot of text and sharp contrasts on the screen, where a game console won't.
So, personally, I am really amazed by this mod, mostly because how easy it was to do.
And, you know, I'm sure the people in Europe aren't too terribly amazed because all of
their TVs from that time period have the SCART connector on the back, which does essentially
the same thing.
Well, SCART connectors are nowhere to be found in North America, so this is far more useful
to someone who lives in North America.
Now, I'm sure a lot of people are going to be wondering why I didn't put BNC connectors
or a SCART connector or something like hat on the back of my TV.
And, I certainly could have.
I mostly just wanted to use the stuff that I had available at the time.
But, if you decide to mod your TV you can use whatever connectors you want on it.
Myself, I'm just happy that I was able to essentially double the usefulness of this
little TV without sacrificing any of its original functionality.
And the other thing I wanted to tell you is that it should, in theory, be possible to
to run a VGA card on this TV.
And you might be thinking, well the frequency is wrong, but many VGA cards can be programmed
to work at 15 kHz.
And you can do that either in some Windows applications or there's actually a DOS TSR
that I've seen before that can actually change the frequency of your VGA card down
to 15 khz.
In which case, you could put that in your AUTOEXEC.BAT or whatever, and then you could
run DOS games in VGA with this monitor, and it would probably look pretty good!
Anyway, so that about wraps it up for this, I hope you guys enjoyed it, and stick around
for the next episode and thanks for watching!


 For more infomation >> IMMORTAL SVEN JUG** WK URSA** - Duration: 3:40:55.
  For more infomation >> Mz Flow -La vida Del Cazzo (Official Music Video ) - Duration: 3:07.
 For more infomation >> Dì Thúy Sẽ Quay Lại Bán Cua Cho Dì 3 Nếu Các Anh Việt Kiều Làm Việc Này - Duration: 16:14.
  For more infomation >> WATCH: Cooler & Cloudy on Sunday - Duration: 2:11.
  For more infomation >> Nhạc chế | Nỗi Lòng Đứa Con Tật Nguyền | Gửi tặng mẹ nhân dịp ngày phụ nữ Việt Nam 20 tháng 10 - Duration: 39:17.
  For more infomation >> Armenian Divine Liturgy - Օրհնեցից զՏէր - Encendé los subtítulos! - Duration: 0:40.
 For more infomation >> 🤘😜🤘 SQUAD Не удачи !!! СТРиМЧИК 👀 - Duration: 11:54:57.

 For more infomation >> Costa Rica VLOG #1 - Duration: 16:42.
  For more infomation >> Thiệu Nhất Nguyên Cắt Tóc Mohican Tại Nhà và Cái Kết - Duration: 6:21.
  For more infomation >> 한글자막) 밤하늘 별빛 ✨ 타임랩스 / 아이폰으로 타임랩스 찍기 / 양평 벗고개 터널 / VLOG 브이로그 - Duration: 1:36.

Không có nhận xét nào:
Đăng nhận xét