hi guys thanks for joining me on my channel today if you like the look I'm
wearing then keep watching and I'll show you how to do the eye makeup
so the stuff you're going to need is if you have a beauty blender that's perfect
that would be great because then you can kind of clean up under your eyes if you
don't, then here's a little trick. You can take one of these triangular sponges and
just rip it! and then you see how it gets that kind of textured textured look to
it that actually works really really well, so wet this completely just like
you would with a Beauty Blender and get it completely saturated squeeze out all
of the water and use this just like a Beauty Blender much less expensive than
that but it works quite well another trick is to take your loose powder and
the sharp edge of your triangular sponge dip it in just the edge can you see that
okay so you have it on the edge like that and what you're gonna do is rather
than taping your corner eye you're gonna go underneath your eyelashes to the
outer corner of your eyebrow like so and stamp it like that you see that
so that little stamp is gonna be your guideline you don't want to take your
eyeshadow past that point okay? so I'll just do that on both sides there you go
so now you have a little crazy line, and you look a little nutty! so now we're
going to get started the other little thing that I'm going to show you is
Indian eyeliner this is called Hashmi Kajal
I use this religiously it's it's my go-to thing what I do is since this is
my own I can take a brush like this one this is a makeup forever liner brush and
you can run that just kind of roll it in the product like so and you can run that
over the waterline like that now the thing I love about this is when you're
doing like a smoky kind of smudgy eye look it's really really nice because it
already it kind of smudges out beautifully but it remains on the
waterline really well clean up under the eyes a bit so we're gonna make a mess
under the eyes let's just ignore it for now and we'll get to the eyes okay so
the next thing I'm gonna do is take a palette now I have a palette called the
NYX this one here it's called the NYX wicked dreams palette and it's got a lot
of really beautiful shades there's 24 shades that come in the palette and it
looks like so really beautiful and we're going to be working with the Blues today
so this blue right over here and I think there's a darker one on this side we'll
be working with those colors gonna do is actually tap this on close to my lash
line just like so and I'm going to put a little bit in the front of my eye I know
usually everybody puts highlighter there but we're gonna do a little bit of a
different look today so I'm gonna put some in the front and I'm just kind of
pushing it in now I'm getting a little bit more and then putting some on the
end and I'm leaving the center empty so don't put it there and now remember that
you put a little tap line of powder don't go past that point okay so here we
go I put some on and you can be you know trying to be a little bit careful about
it but if you kind of mess it up it's not a big deal because this is a smoky
smudge you kind of locate and Messier is okay so look at how beautiful this color
is though it's stunning here we go
so we got some there and we've got some there now you're gonna take a brush you
can either take a brush that looks like this or one that looks like this so
basically you need a blender okay and you're gonna blend it out I'm gonna use
this one you can get this from Mac there's a whole bunch of different
brands that make them I think Sigma makes them but you can get them
everywhere and then I really like the the one from Real Techniques it's one of
my favorites too so I'm just gonna take a little bit more product just to help
me blend this out and now I'm going to top it off and then apply it with the
brush and again I'm not going to past that point and I'm just gonna kind of
what you do is you pull in from the outside don't go like a wind washer or
you know like a windshield washer don't go back and forth you're actually gonna
go like inwards so start on the outer point and come in and you're going into
the socket line this is the little my battery totally died so I completed the
eye look on one side and now I'm gonna finish hit on the other side for you so
sorry about that so I like I said I was doing the blue and stuff and now I'm
taking the lighter color from the NYX palette which is this one here okay the
the whitish yellow there and we're going to apply that to the center using
a small detail brush basically and that's going right in the center here so
I had already applied that when the battery died so there's that and what I
did is take a brush that looks like this you can get them from different brands
and I actually am going to spray it and wet it a little bit and you can use
water you can use rose water you can use mist and fix if you have that I'm using
cinema secrets moisture spray brings moisture back to your face it kind of
livens it back up again we're gonna apply a little bit more like packed on
color like so and by wetting the brush a little bit it saturates it more with
color so you get more intensity and then I'm putting a little bit in the front as
well and I know like right now this I looks crazy but it'll come you have to
go through that whole like crazy stage first and then it kind of comes together
if you just keep going keep blending keep going it'll work the key is gonna
be blending oh and I'm gonna put the little powder that I had before actually
and create that line that I had before because obviously after my battery died
it faded away so I'm just gonna put that back and that's right there for you okay
so again we're just putting that blue color packing it on good and then take
your blending brush that looks like this and what I'm actually gonna do is take
another pallet of mine I'm using the color, this is the Viseart palette and I
love it so much as you can tell it's a mess but I'm going to take the color
that's kind of a bricky brown color
and I'm going to use that as my transition color so applying it with
like a pointed brush or a blending brush you're gonna take it take top it off cuz
this stuff is really potent it's very pigmented and kind of take that above
your blue and into the socket and kind of going again from the outside corner
end blend it and bring the two together and
now I'm gonna because this is a dark area and this is usually where you would
do some contouring I'm bringing it right up to the brow in the front and that
gives you like a beautiful contoured socket it's already done on this side as
you can see and I'm just blending this brush is fantastic for blending by the
way the only thing I find with it is you can go overboard with your blending the
strokes have to be very light as you can see I'm holding the brush from the back
where the rubbery section is maybe that's why it's like that actually and
blending from back here that way cuz if I was doing it from here I would
probably blend everything away completely so I'm just again bringing
some of it up making take a little bit more and blend and I'm gonna add a
little bit of this taupey type of color and blending blend blend blend there you
go and now if you want you can go back and take a little bit of that blue
that's left on the brush I'm not taking more product
I'm just taking what's on the brush and adding that back in so that I don't lose
the depth of that color and just adding a little more there we go
okay so now I'm gonna take a pointed brush and I'm taking the lightest two
colors that I have in this palette again this is the Viseart palette
eyeshadow - palette number one okay and this is a
makeup artist favorite so they're beautiful colors blend beautifully I'm
going to take that and put it just in the front of my eye here just like that
and kind of blend that out so it's a nice brightness there and then I'm going
to take the two colors again and on the outer part of my brow bone just out of
here I'm not adding it here where we had already put the darkness because that
would defeat the purpose there we go just applying it there go back to my I'm
gonna take a clean blending brush and just softly blend that out so there's no
harsh lines anywhere blend blend blend there we go I have a cream eyeliner look
it's a it's the kind that you can wet this one is from Ben Nye it's a cake liner
and I love these for being able create intense black eyeliner liquid
looks you know really intense you can smoke it out you can do to so many
things with it and it's washable so if you make a mistake you can wipe it away
and that's that everything with makeup right like if you make a mistake wash it
off start again and have some fun it's not a big deal so I'm taking my moisture
spray and just spritzing the the actual contact and I'm taking a small this is a
makeup forever liner brush and I think this one is number 250 straight it's a
really nice tight brush
and I'm gonna just put that in the color and kind of roll it so it picks up color
and you can see it's already drying like I don't have a pool of water in here
there's enough there when you have a damp just picking up a little bit what a
wetness from there adding it in and now we're going to do our eyeliner so the
way to do this is to start on the outside corner what I do is just go to
the outside tip and just create a flick like that and I use that flick to come
back inwards
and then I kind of top along the lash line now what I'm doing here is I'm
putting a little bit of eyeliner on before I put my false lashes on because
what that does is cover all the skin that might show through on my lashes and
I don't want that to happen so I'm just gonna cover that up with a little bit of
black eyeliner and I like to work in layers in my makeup so I'm going to come
back to this eyeliner after the lashes as well so there's that
I'm just kind of poking it in pressing it in I'm not trying to create a
straight line across I'm kind of creating dashes and then pulling the
dashes so they blend out because nobody's gonna really see that part okay
there we go now I'm gonna curl my lashes very very important step so I have my
Billy B Lash curler and what I do with this is hold it as close as I can to my
lashes and then I kind of walk it out and keep stamping as I go you're gonna
have it like looking really freaky but it'll work really well and give you a
really beautiful curl - you just said really like four times but so here we go
I'm looking down in the mirror and you clamp it as close to your lash line as
you can hold for a count of five okay okay and then step out do it again
step out and you see the way it is now I look really freaky but it gives you a
really nice natural curl to your lash then I'm gonna put my voluminous mascara
and again my stuff is very well-loved it's all erased off of there but this is
carbon black voluminous from L'Oreal so I'm putting a light coat of that on my
lashes and I'm gonna put a little bit on the top end too so that any eyeshadow
that might have come on my lashes isn't creating like a weird color on them so
that when I put my false lashes on there's not going to be a shadow of
whiteness there okay so that's done and now we get to the fun part the false
lashes so I'm just using this is precision lash adhesive from Revlon
and I have my lashes are from Red Cherry I think they're Red Cherry number 1
fantastic lashes they have a nice thin band to them and that makes them easy to
apply when you get lashes that have a really thick base band at that part at
the front like where you're actually going to be applying them they can get
really hard to be flexible and get on your your eyes so here we go now the
best way to do this is with a mirror down on the table rather than looking
into a bathroom just like I've been doing everything else so you keep your
eyes open but looking down and then you kind of bring them close to your lash
line and you can see I'm not I'm taking my time here I'm not rushing applying it
to the center and then grabbing the ends and bringing them closer some people
like to use tweezers I'm I'm more of a hand person so I'll use my hands and
there we go
and I'm just bending it down to attach it and kind of pinching them together a
bit so that's one set of lashes there we go and then make sure they're on I kind
of take my finger and push against the curve of the lash by doing that it kind
of pushes them in and attaches them even more okay so there's that and I'm going
to do the other set of lashes so we're actually doing a double set of false
lashes talked about drama all girls need drama in their makeup not in their lives
okay so now we do exactly the same thing
sorry I'm not in frame sorry about that
okay so there is the other set okay and I'm just pinching those together and
making sure they're set together these ones are nice and secure because I did
them while the battery was charging maybe that's what I need to do is invest
in more batteries for sure black eyeliner I'm using Milani's I'll show
you
like this one for for everyday kind of use I don't like it so
much for parties and stuff because I do find that it travels but like I said I
am using the Hashmi eyeliner I'm just adding more drama so I'm putting a
little bit more so I'm just adding a little bit here and mostly I'm putting a
little bit on the bottom of my eye just on the outer edge and then I'm gonna
take a little brush like so and just kind of blend that out I think this one
comes in Real Techniques little kit that comes with four eye brushes and it's
fantastic too for details so just blending that out
and now I'm going to go back to the NYX palette just making a mess and dropping
things everywhere and taking that blue color that we had started with and
putting a little bit of that under the lash line so we want to kind of bring
the two together and I'm actually going to go in and take this darker and more
intense kind of shut through with a little bit of a blue sparkle too which
is really nice
I'm going to take a little bit of that and add that to the bottom lash
and that just gives a little bit more depth and intensity to this whole look
and then I go back to my pencil brush and my Viseart palette and take those two
colors so really we've only used about four colors in total for this look but
you don't even have to do that if you only have like a brown shadow a deep
blue one and something with usually in those like quads you get something with
a little bit of a lighter color that you can put in there then you're set you
don't need to do anything else there you go just make sure they're both lookin
similiar there we go and yeah well I go back to my cream Ben Nye cream liner
and it's kind of dried out now so I'll add a little bit more liquid to it so
it's nice and damp again and now we're gonna do our more dramatic eyeliner so
I'm just rolling it in there and starting at the front I'm doing a
very thin line at the front just like that and blending it over where I click
the eyelashes because really the eyelashes are also kind of giving you an
eyeliner look now especially with two of them stacked on top of each other
and then we can create that wing
am i in frame there sorry
and you see how we had that powder line there it's giving me a nice clean line
that way
good there you go I'm gonna take a little bit of that and add that to the
bottom lash and that just gives a little bit more depth and intensity to this
whole look and then I go back to my pencil brush and my Viseart palette and
take those two colors so really we've only used about four colors in total for
this look but you don't even have to do that if you only have like a brown
shadow a deep blue one and something with usually in those like quads you get
something with a little bit of a lighter color that you can put in there then
you're set you don't need to do anything else there we go just make sure they're
both looking similar there we go and yeah well I go back to my cream Ben
Nye cream liner and it's kind of dried out now so I'll add a little bit more
liquid to it so it's nice and damp again and now we're gonna do our more dramatic
eyeliner so I'm just rolling it in there and starting at the front I'm doing a
very thin line at the front just like that and blending it over where I put
the eyelashes because really the eyelashes are also kind of giving you an
eyeliner look now especially with two of them stacked on top of each other
and then we can create that wing
am i in frame there sorry
and you see how we had that powder line there it's giving me a nice clean line
that way
good here we go and that's the I look so I'm gonna come back I'm gonna go finish
the rest of my face and come back and you'll see the finished look okay be
right back

 For more infomation >> Bogas in the PALMAR dam #Part 5 - Duration: 4:40.
  For more infomation >> Bilgisayardan iPhone'a Müzik Atma (Kolay ve Basit yolu) | Send music to iPhone - Duration: 2:51.
  For more infomation >> Multiplayer race 🏁 #4 | Asphalt8 - Duration: 1:06:30.
  For more infomation >> MASTERCHEF (OR NOT) - Duration: 4:52.
  For more infomation >> Za molitvata - Otec Nikon - Duration: 57:50.
  For more infomation >> O que eu prefiro ? | Karol Clorado | Libras e Ative legendado | - Duration: 8:03.

 For more infomation >> El Tamborilero, Villancico Animado - Canticuentos - Duration: 1:56.
  For more infomation >> Gimper - Tururu! /Remix Ruzio - Duration: 0:20.


 For more infomation >> Cape de portage Grimawak en sling - Duration: 1:25.
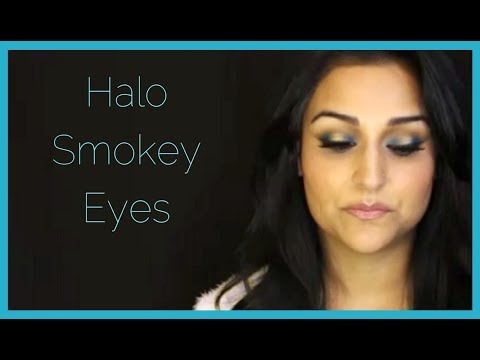

Không có nhận xét nào:
Đăng nhận xét